
Who doesn’t think of piñatas when you think of Cinco de Mayo celebration? My friend, Debby, was throwing a taco party and we were talking about decorations. Of course, piñatas came to mind. How cute would it be to have little piñatas on the table. Debby challenged me to figure out how to make mini piñatas without spending money. Challenge accepted!
First, I did my research at the store to see how the full-sized piñatas were made and took pics of the structure. Then, I looked around my house to see what supplies I had already that would work for a mini version. I have tons of toilet paper rolls saved up for craft projects. I also found rolls of streamers in all kinds of colors leftover from former parties. Everything I had was already in my craft closet. Here are the steps I used to create these festive decorations, although I did not fill them with candy. Older kids can create these but it’s best if younger kids only help with the decorating.
SUPPLIES TO MAKE A DONKEY PIÑATA
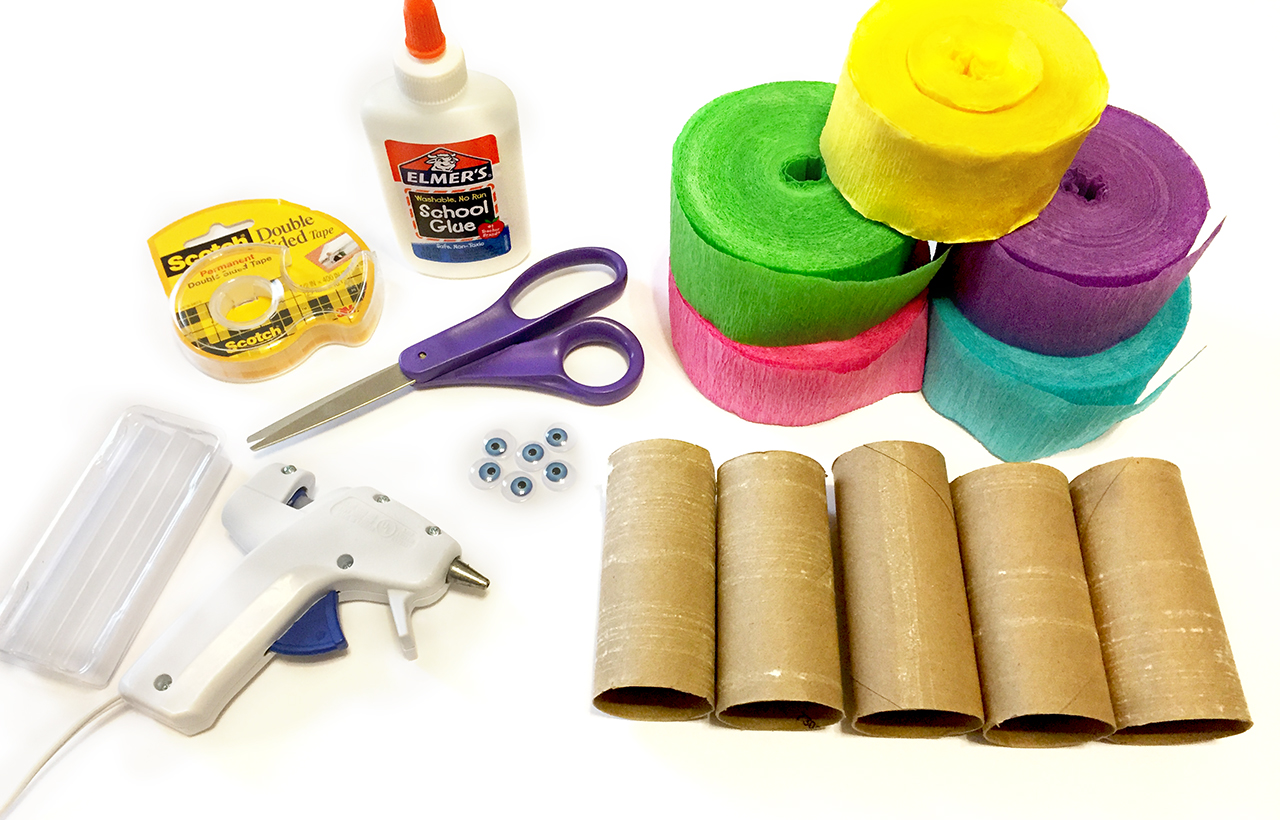
- 5 toilet paper rolls (or 3 paper towel rolls will work)
- Party streamers (multiple colors)
- Googly eyes
- Scissors
- Double stick tape
- White Glue
- Glue gun w glue sticks
BUILDING THE STRUCTURE
 I chose a traditional donkey shape for the mini piñata. This isn’t an exact craft with measurements. These casual little guys will look just as good if you eyeball the measurements.
1. Start with your 5 toilet paper rolls. These will form the structure.
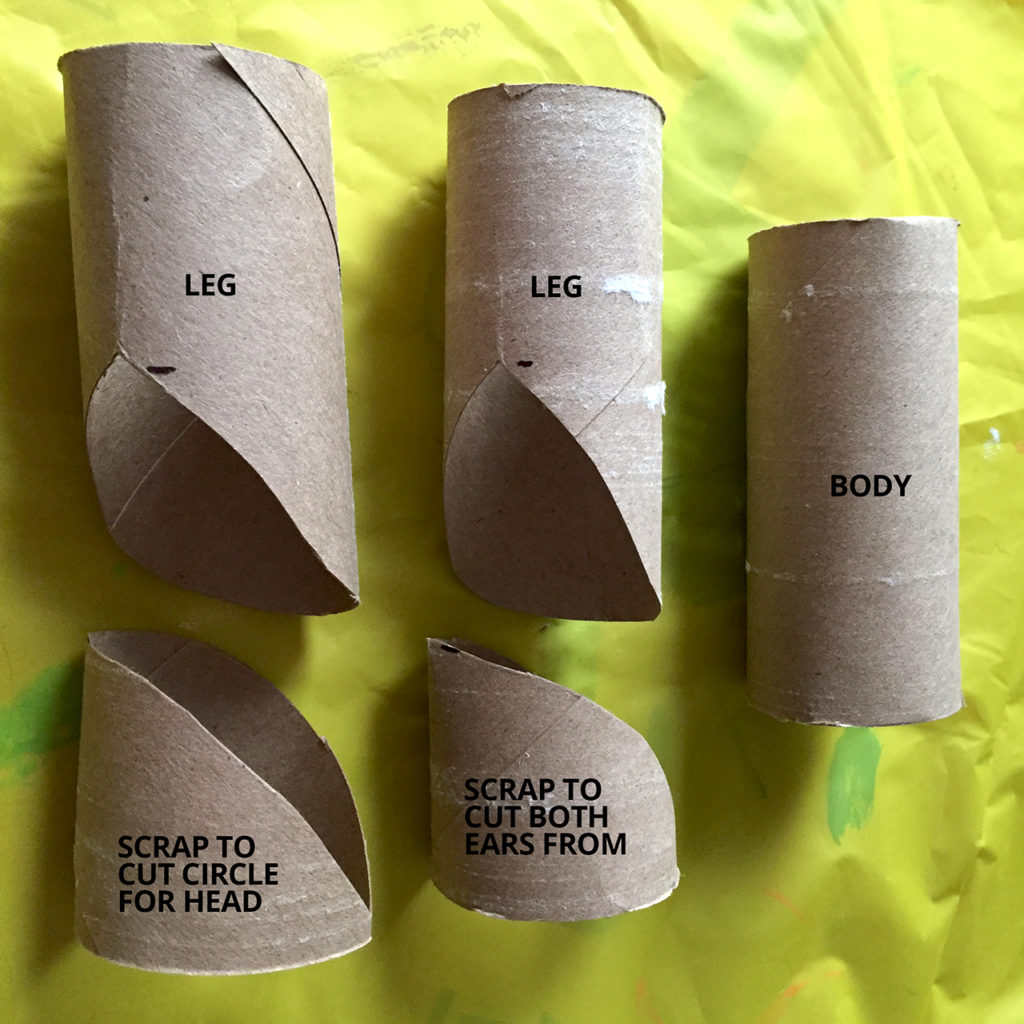
2. The body will be one full roll. Set it to the side.
3. The legs take two rolls. Trim them at an angle as shown. Keep the scraps.
Pro Mom Tip: I designed this piñata to only have 2 legs, one in the front and one in the back, to keep it standing and to simplify the design.
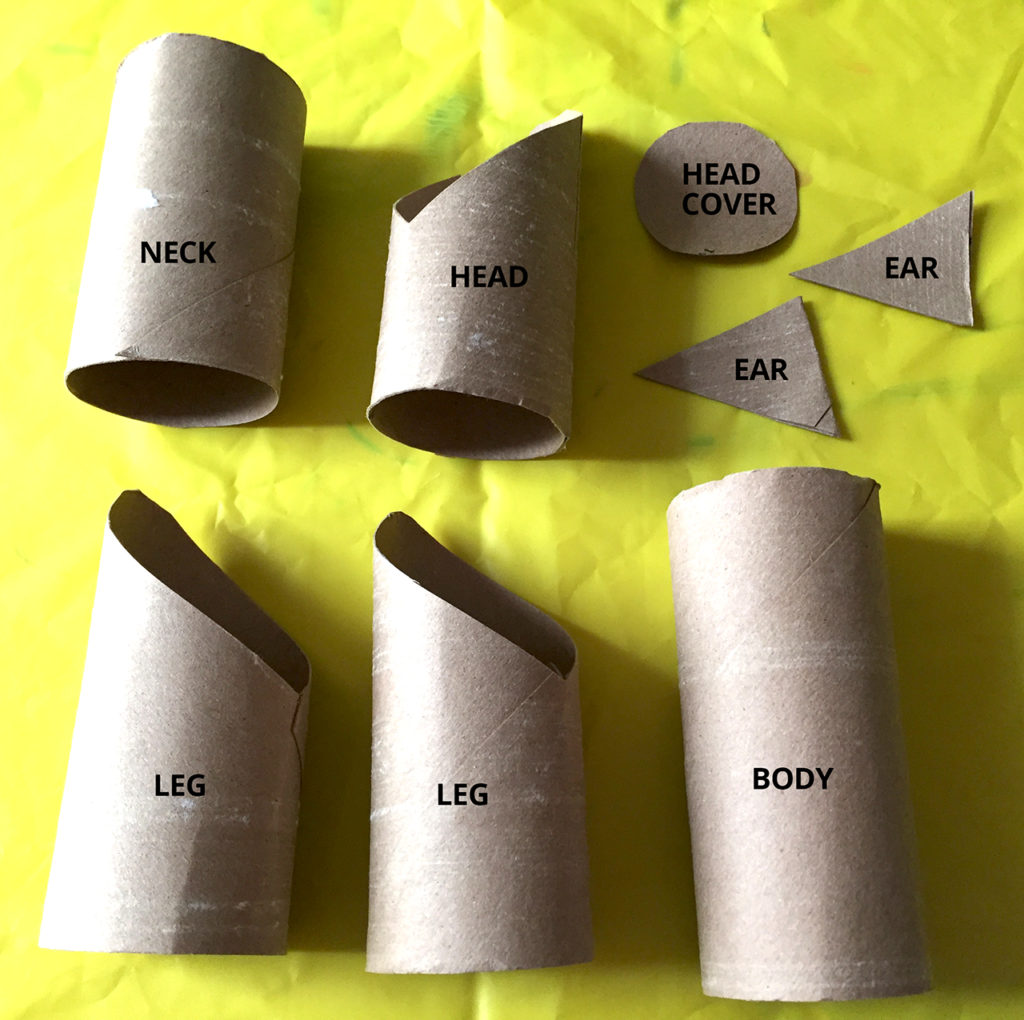
4. The 4th roll will be the neck. Trim off about an inch or two straight across.
5. Make the head from the last roll by trimming it off at an angle as shown.
6. Using some leftover roll, trace and cut out a circle for the end of head.
7. Make the ears by cutting triangles out of additional scrap toilet paper roll and fold them lengthwise.
Pro Mom Tip: By folding the triangles to make smaller ones will make each ear thicker. I used double stick tape to stick the folds together.
8. Get your hot glue gun ready.
Pro Mom Tip: Hot glue as much as you want and it doesn’t have to look pretty. It’s all going to get covered up anyways.

9. Glue all the pieces together. Start gluing the legs to body, then the neck.
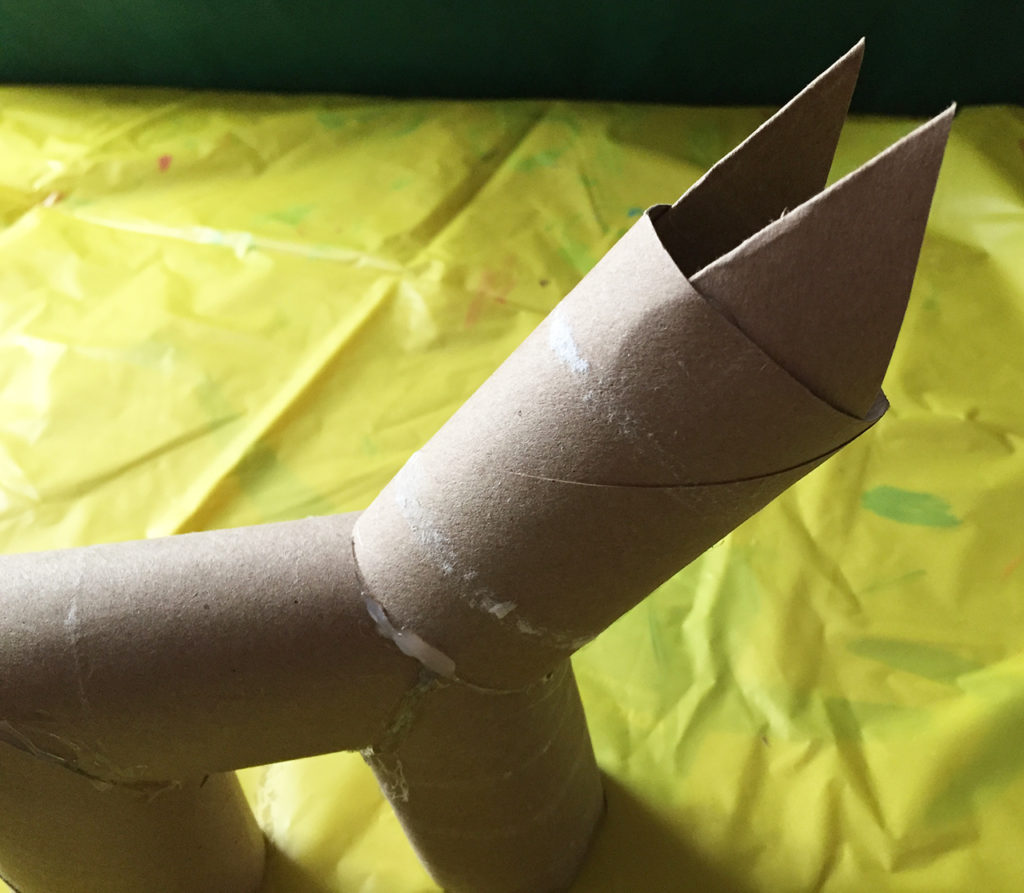
10. After the neck, you’ll need to glue the ears to the inside of the neck with the points sticking out.

11. To fit the head, you will need to cut slits into the curve of the head as shown to slide the head around the ears. Glue the head onto the neck.
Pro Mom Tip: You can hold the head near the ears, and mark where you need to cut the slits instead of guessing.
12. Finally, glue the circle to cover the opening on the the nose part of the head.

13. Once everything is glued and cooled off, set the piñata on a flat surface. If it’s not balanced, just trim the bottom of the legs so that the piñata stands up straight.

Pro Mom Tip: If you decide to make more than one, I would create all the structures at once before starting the decorating part.
DECORATING TIME
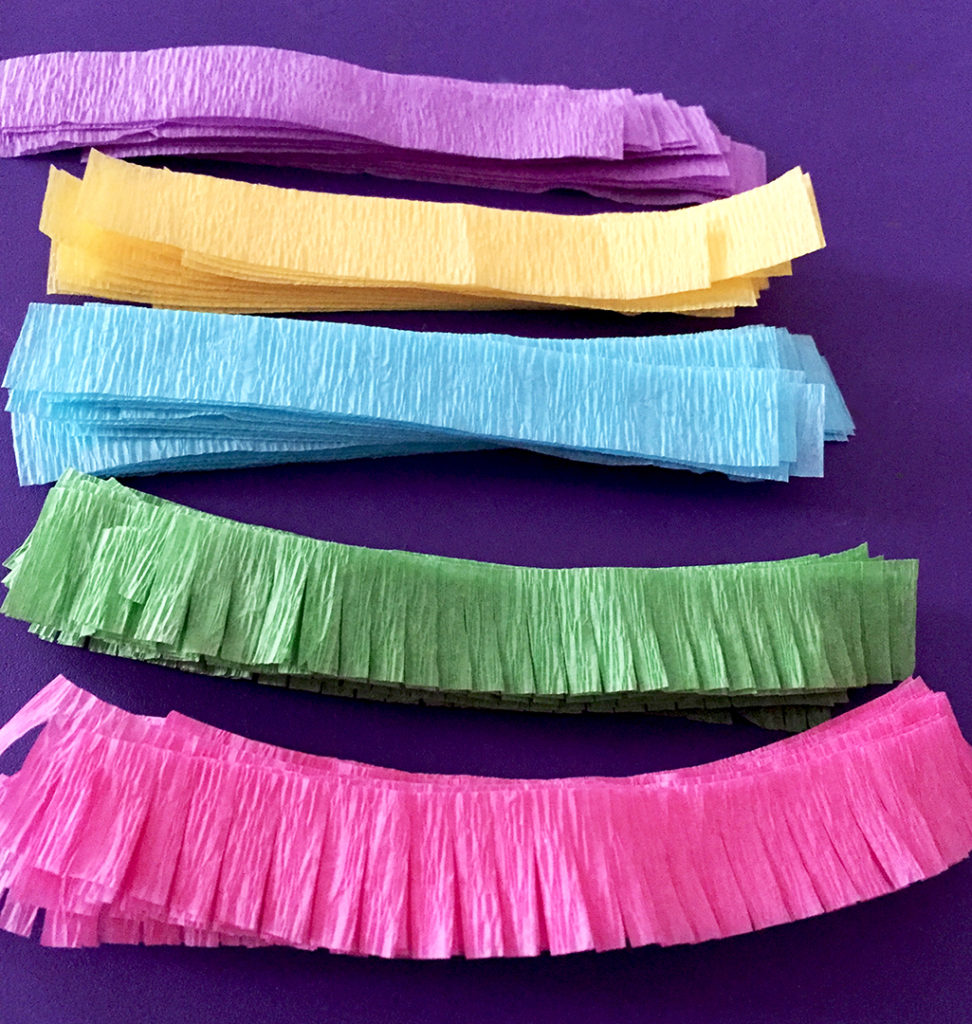
1. Gather your streamers or crepe paper and cut into 8 inch strips.
Pro Mom Tip: Cut at least 6 of each color to start out with. You can always add more when you run out.
2. Cut the strips in half horizontally into thinner strips.
Pro Mom Tip: If you stack all 6 of each color together, you can cut the 6 strips in half at once.
3. Cut lines half way up each strip to create the fringe.
Pro Mom Tip: You can easily gather several at a time to cut.
4. Repeat until all the colors are ready to use.

5. Starting with the bottom of a leg, apply a thin strip of glue to the toilet paper roll and place the the non-fringe part of the paper on the glue wrapping around the leg.
6. Continue layering colors until the pinata is completely covered.
Pro Mom Tip: I did the bottom of the legs and then worked my way from back to front.
7. Glue on the googly eyes.
8. Let your piñata dry overnight.
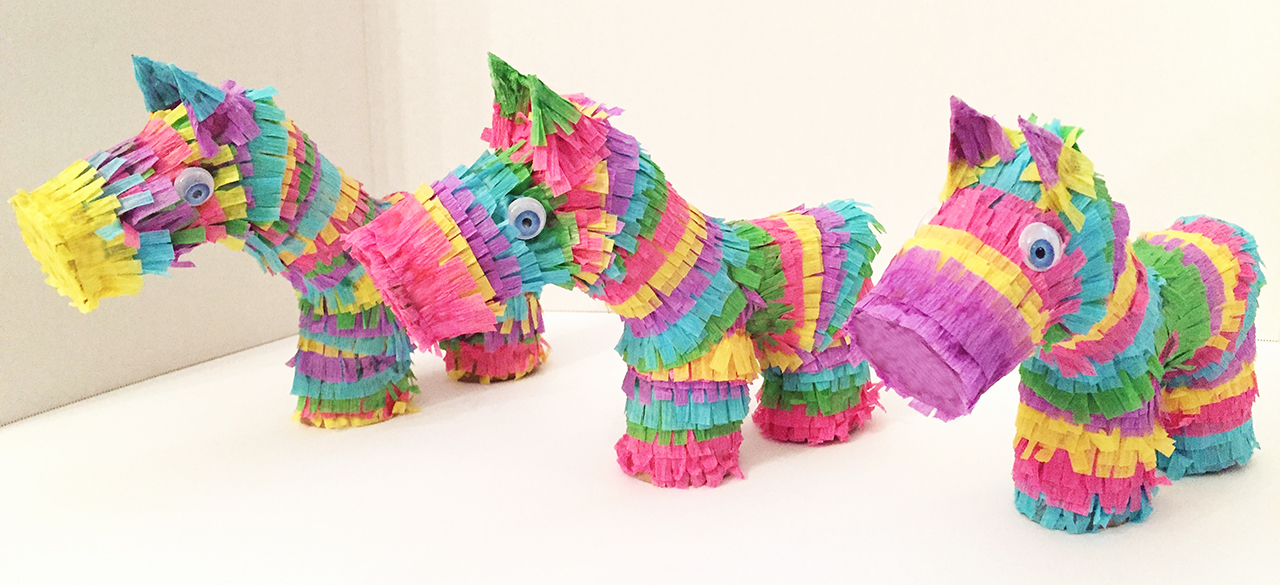
Once it’s dry, it’s ready to join the fiesta. This DIY craft is a bit more time consuming, once you get the structure of one Donkey figured out, it gets easier to make additional ones. I created all of the structures first. Then Emma and I wrapped them all with colorful strips.
Pick whatever pattern and colors you want and experiment. We tried one color strip, two of same color strip and three of same color strip to see what it would look like.
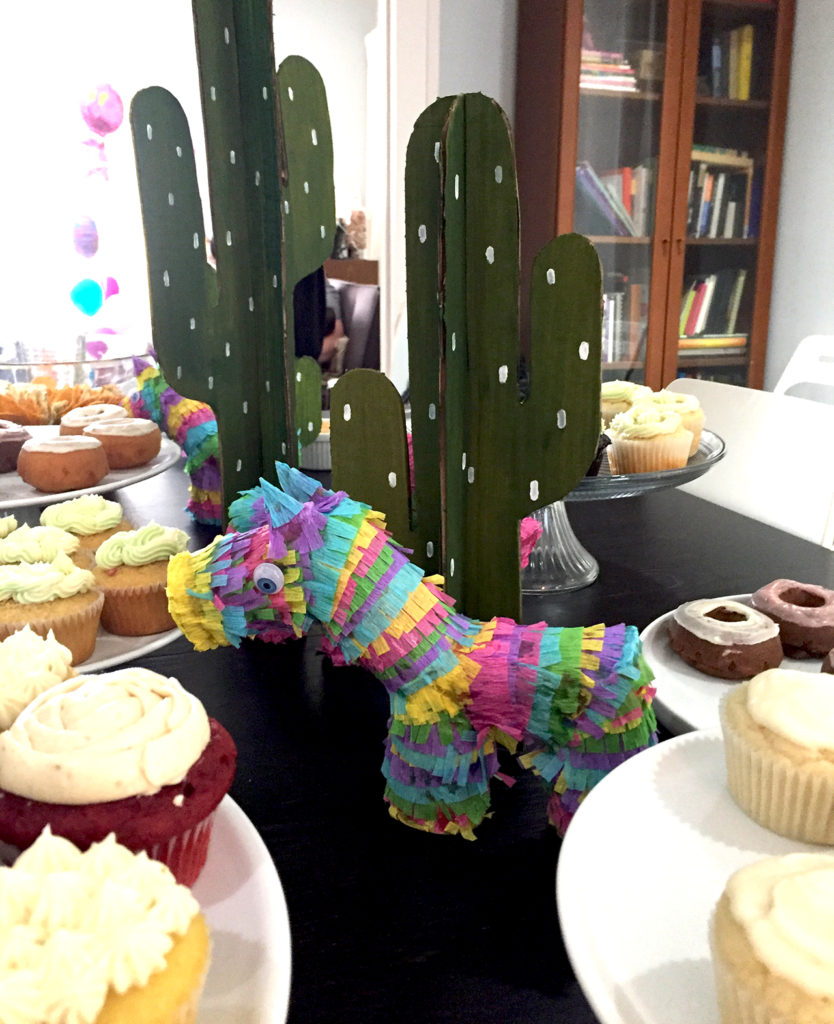 I didn’t create these to fill with candy but you could add small candy to the legs and cover the opening with tissue paper. You can even hang these and add a ribbon to the tissue paper covering the bottom of the legs so kids can pull for small handfuls of treats.
These will be a great addition to your Cinco de Mayo celebration or any fiesta. You can also add other fun elements like cut out cardboard cacti and sombreros. I hope you all have a wonderful fiesta!
Love,
Jeannie
Leave a Reply