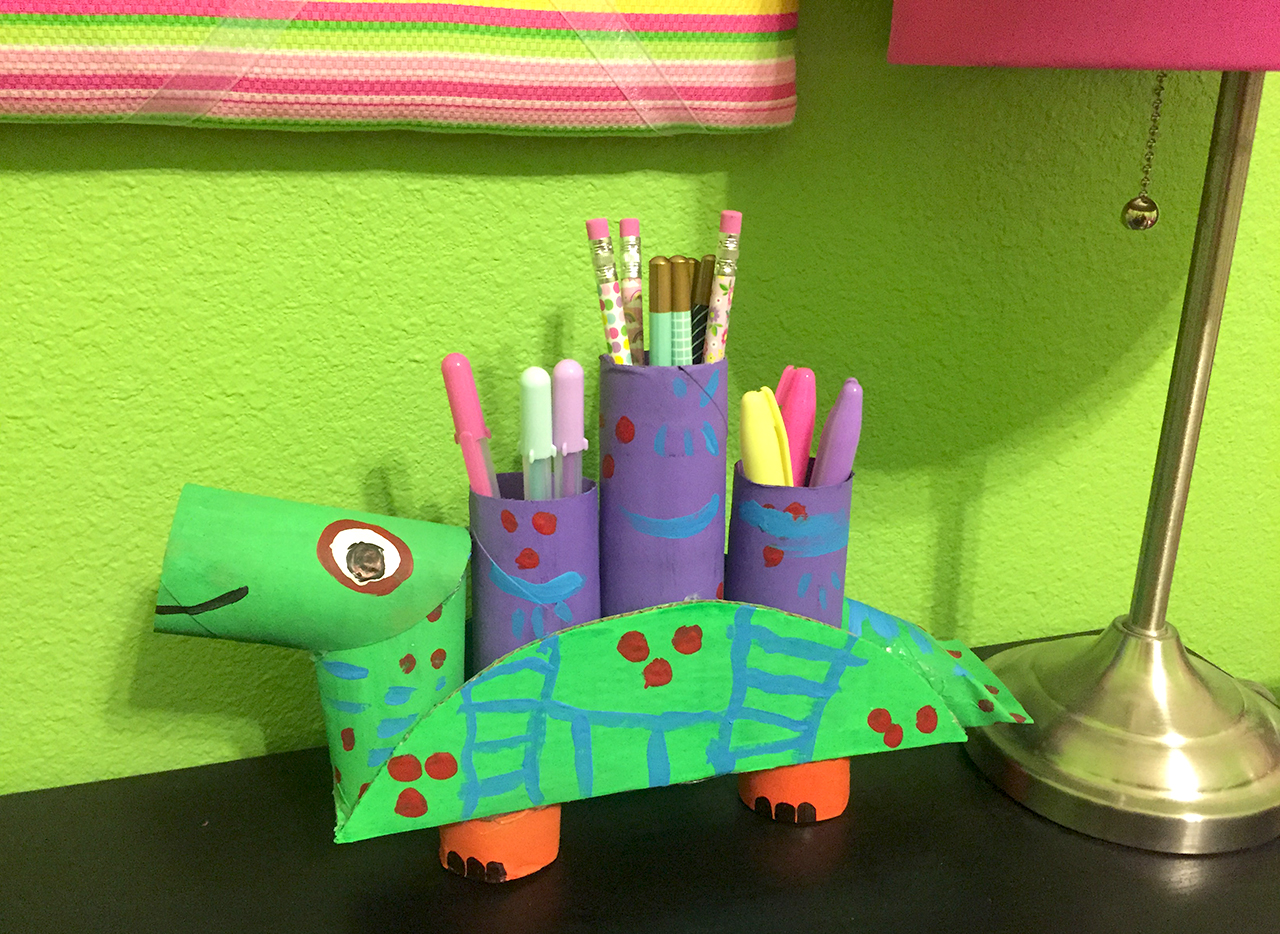
Dinosaurs are always a favorite among kids and adults. Here’s a fun summer project for the kids – a cute dino craft that is personalized and functional.
We have already created several dinosaur pencil holders for friends and family and we’re still getting requests. Emma loves decorating them each differently. If this is something you and the kids are interested in creating, just follow these easy steps.
SUPPLIES NEEDED
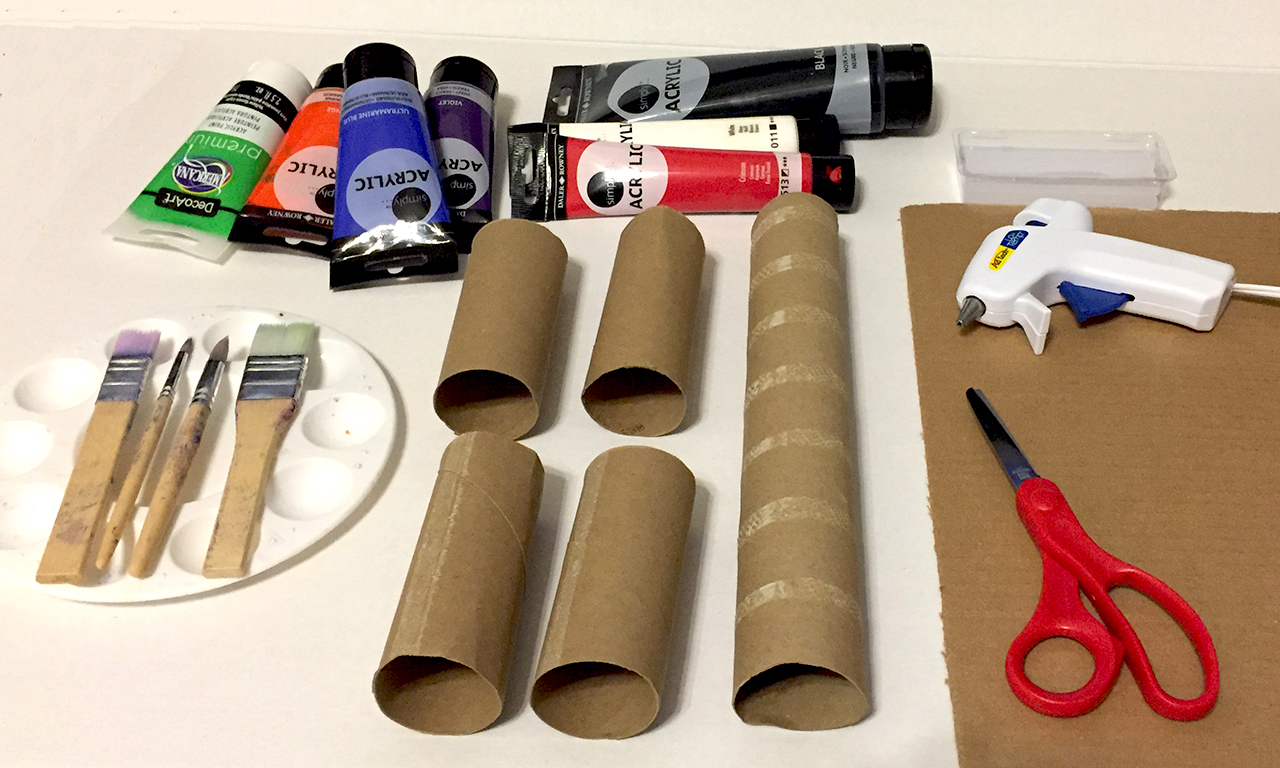
- 4 toilet paper rolls
- 1 paper towel roll
- Cardboard
- Acrylic paint
- Paint brushes
- Paint palette or paper plate
- Cup of water (to clean brushes in)
- Paper towels (to dry brushes with)
- Pencil
- Scissors
- Glue gun
- Glue sticks
- Disposable plastic table cloth
CUTTING OUT ALL THE PIECES
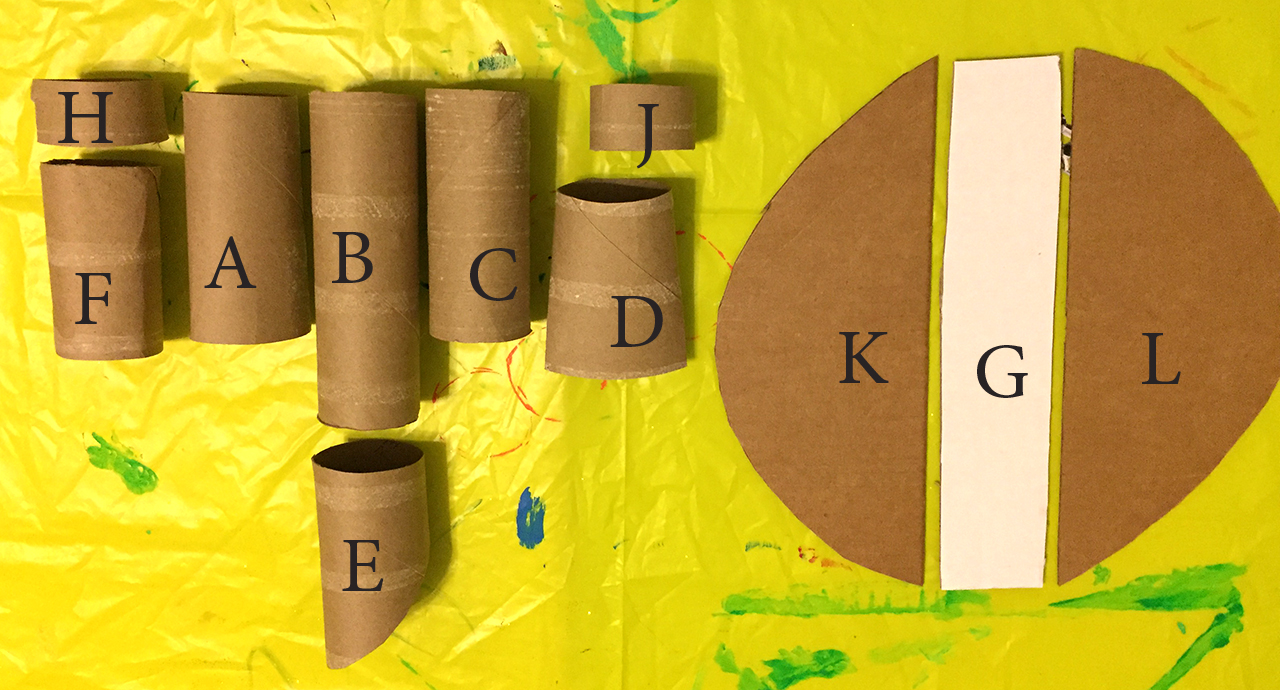
This craft doesn’t have any exact measurements. Your dinosaur will look great even when you eyeball the measurements for all the pieces. Gather the 4 toilet paper rolls, 1 paper towel roll and the cardboard. These will form the structure.
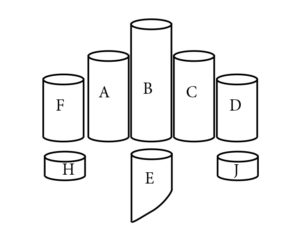
1. Start with 2 toilet paper rolls and put those to the side. No need to cut these, they are the 2 side pencil holders (A & C).
2. Grab the paper towel roll. Cut it so that it’s taller than a toilet paper roll to create the middle pencil holder (B).
3. The smaller piece left over from the paper towel roll will be the head (E). You need to cut a corner off as shown above.
Pro Mom Tip: Don’t worry about making this perfect. Once you assemble, you may need to trim more off as needed.
4. Now you need the last 2 toilet paper rolls. Trim off a small piece on both rolls and make sure they are the same size.
5. The small pieces will create the feet (H and J).
6. The larger pieces will create the neck (D) and tail (F).
7. To create the last parts, you’ll need the cardboard and pencil.
Pro Mom Tip: We used cardboard from shipping boxes we had received.
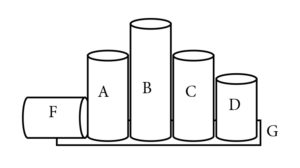
8. Lay down a flat piece of the cardboard. Take the A,B, C and D pieces and stand them up on the cardboard. Take the F piece and lay it down.
9. Next take the pencil and draw a rectangle around all the pieces and half way through the tail because half of the tail will be hanging out. Cut the rectangle out and this will create the base for the dinosaur. (G)
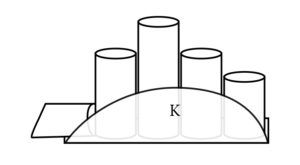
10. You’ll need to draw one of the curved sides of the dinosaur. Start by drawing a line matching the same length of the base.
11. Go from one point of the length and curving to the other point like your drawing a rainbow. Cut this shape out.
12. Place A, B, C, D and F back on top of base for positioning. Now take your side and hold it up to all the pieces as shown above to make sure you are happy with where it hits on your dinosaur. Trim the shape to your satisfaction if needed. (K)
Pro Mom Tip: If the side shape is too big than trim it to just the right shape and size you want.
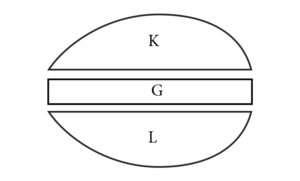
13. Once your happy with the side shape (K), than trace it on the cardboard with a pencil to create the other side. Cut the shape out when done. (L)
Pro Mom Tip: Make sure you do mirror images of the side shapes for the fronts so they match up visually.
14. Now you have all the pieces that are needed to create your own dinosaur.
DECORATING TIME
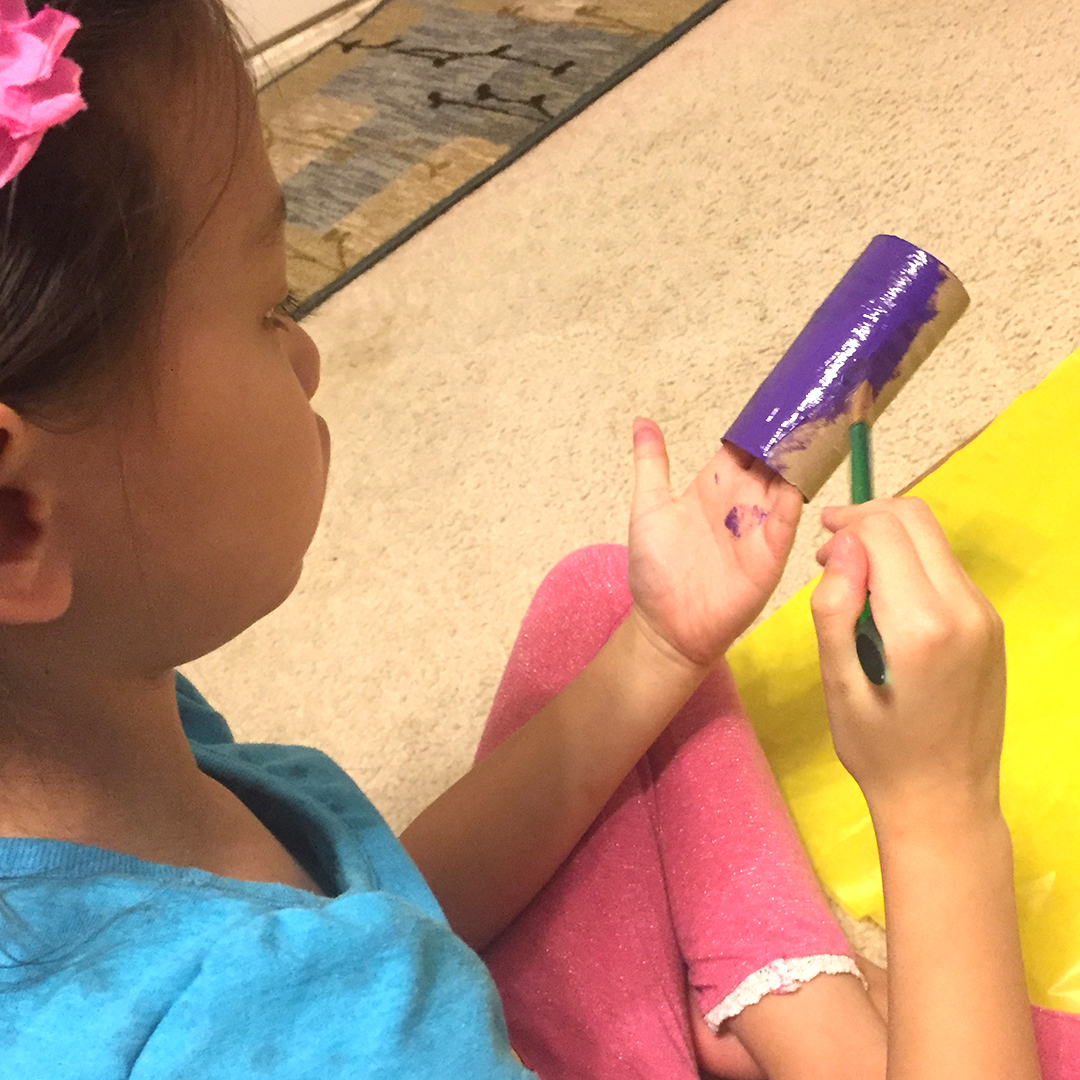
It’s time to decide on how you want to decorate your dinosaur. Cover your craft area with the disposable table cloth before painting. Have the paint, paint brushes, palette, cup of water, paper towels and all your pieces on the table cloth. Now it’s time to start.
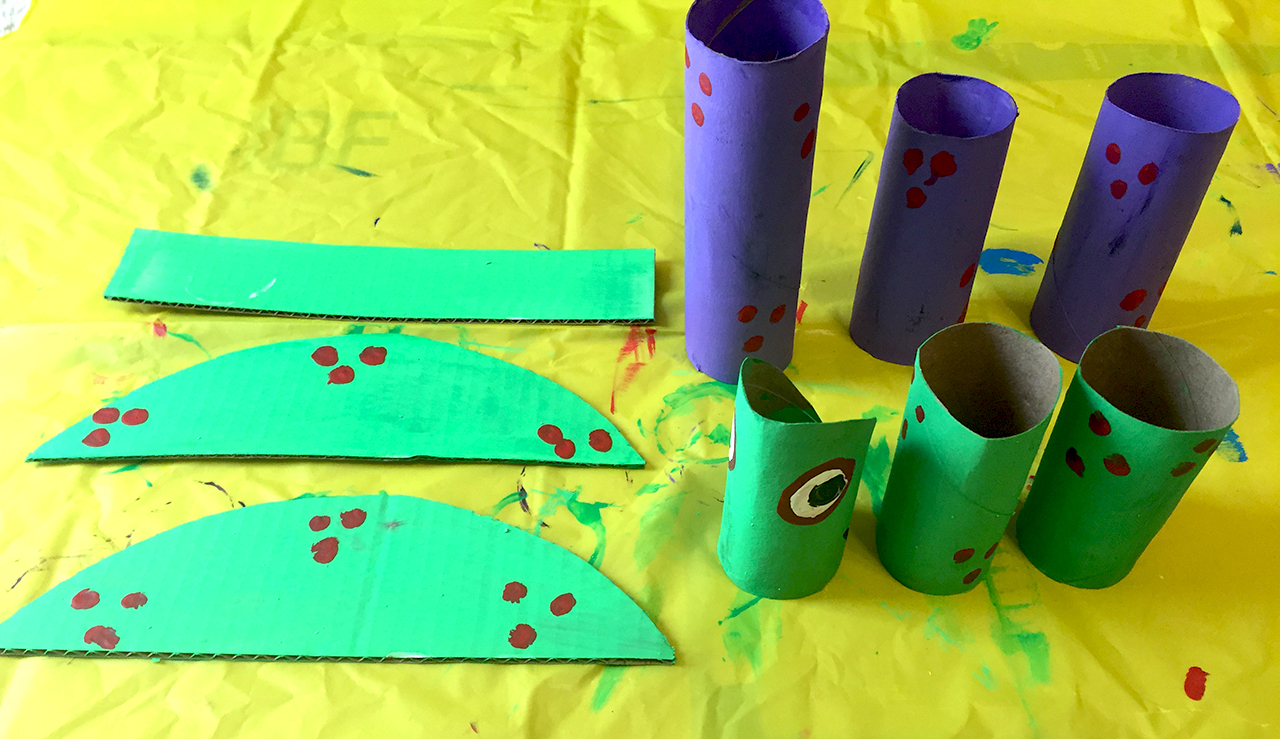
1. Group your pieces of the dinosaur according to the main colors you want to paint.
Pro Mom Tip: Emma chose 3 main colors. The head, neck, tail, base and sides are green, pencil holders are purple and the feet are orange. Sorry, feet aren’t shown in picture because we decided to add feet afterwards.
2. Start painting all the pieces one color at a time so you don’t have to keep cleaning your paint brushes constantly.
Pro Mom Tip: If the color seems too dark as your painting, mix in some white to the color. The white will help the color pop off the brown.
3. When in between paint colors, use your cup of water to clean off the brushes and the paper towels to dry them off real well.
Pro Mom Tip: Acrylic paint gets real runny when the brushes have too much water on them.
4. Once all your pieces have a base color, let it dry for about 15 to 30 minutes depending on how thick the paint is.
Pro Mom Tip: Make sure to paint half of the insides of the head and the pencil holders and both sides of the dinosaur sides since they will be visible once assembled.
5. Now that the pieces are dry, it’s time for the personalized details. Paint whatever decoration you want on your dinosaur.
Pro Mom Tip: Remember parts of your pieces will be covered like the base and parts of the neck, pencil holders and tail.
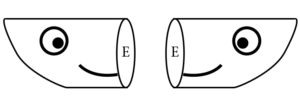
6. The head will need the eyes and mouth.
Pro Mom Tip: Googly eyes would work too if you have some around.
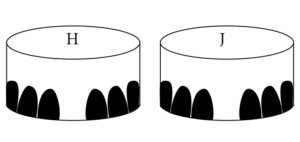
7. Each foot will need 2 sets of toes so you can see them no matter which direction your dinosaur is facing or when it just wants to stomp around.
8. Once complete with all the decorations, let everything dry for about 30 minutes before you start to assemble.
BUILDING STRUCTURE
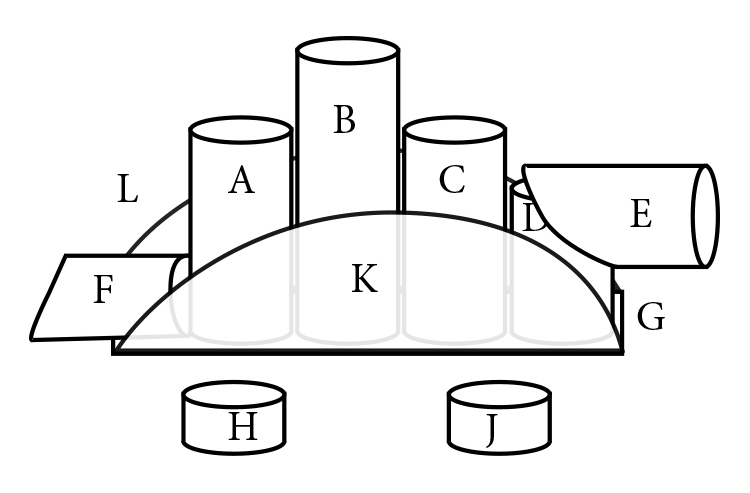
Finally with all the pieces cut out, decorated and dry… it’s time to put your dinosaur together. The easiest, fastest and strongest way to put all the pieces together is with a glue gun. Time to lay out all your pieces so you know what’s going where.
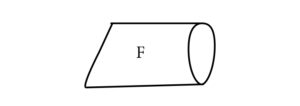
1. Take the tail (F) and glue one side together and hold it to flatten that side, than put it back with all the pieces.
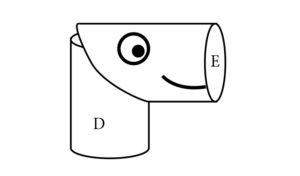
2. Glue the head (E) and the neck (D) together as shown. The curve part of the head should fit over the top of the neck.
Pro Mom Tip: Check the fit before glueing. You may need to trim more of a curve on the head to get it to fit right on the neck.
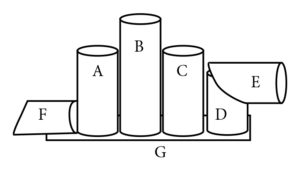
3. Take the base (G) and lay it down flat. Place all the pieces that would go on top of the base (G). This includes the tail (F), pencil holders (A,B & C) and the neck with head glued on (D&E). Once placed, pick up each piece and glue them on the base one at a time.
Prom Mom Tip: You can also glue the standing pieces to each other for extra support.
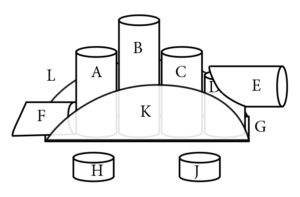
4. Once all the pieces are glued on the base, it’s time to glue on the sides.
5. Put hot glue on the side of base and bottom sides of the pencil holders. Quickly press the side piece (K) to it. Make sure to match the bottom of side piece to the base.
6. Next you’ll need to do the same to glue the other side piece (L).
Prom Mom Tip: Make sure you mirror image the sides so they match up when you glue them on.
7. Lastly, time to glue on the feet. Glue one foot (J) towards the front and one foot (H) towards the back.
Pro Mom Tip: We would place the feet on a flat surface, than put the body of the dinosaur on them to make sure it’s balanced before we glue the feet on.
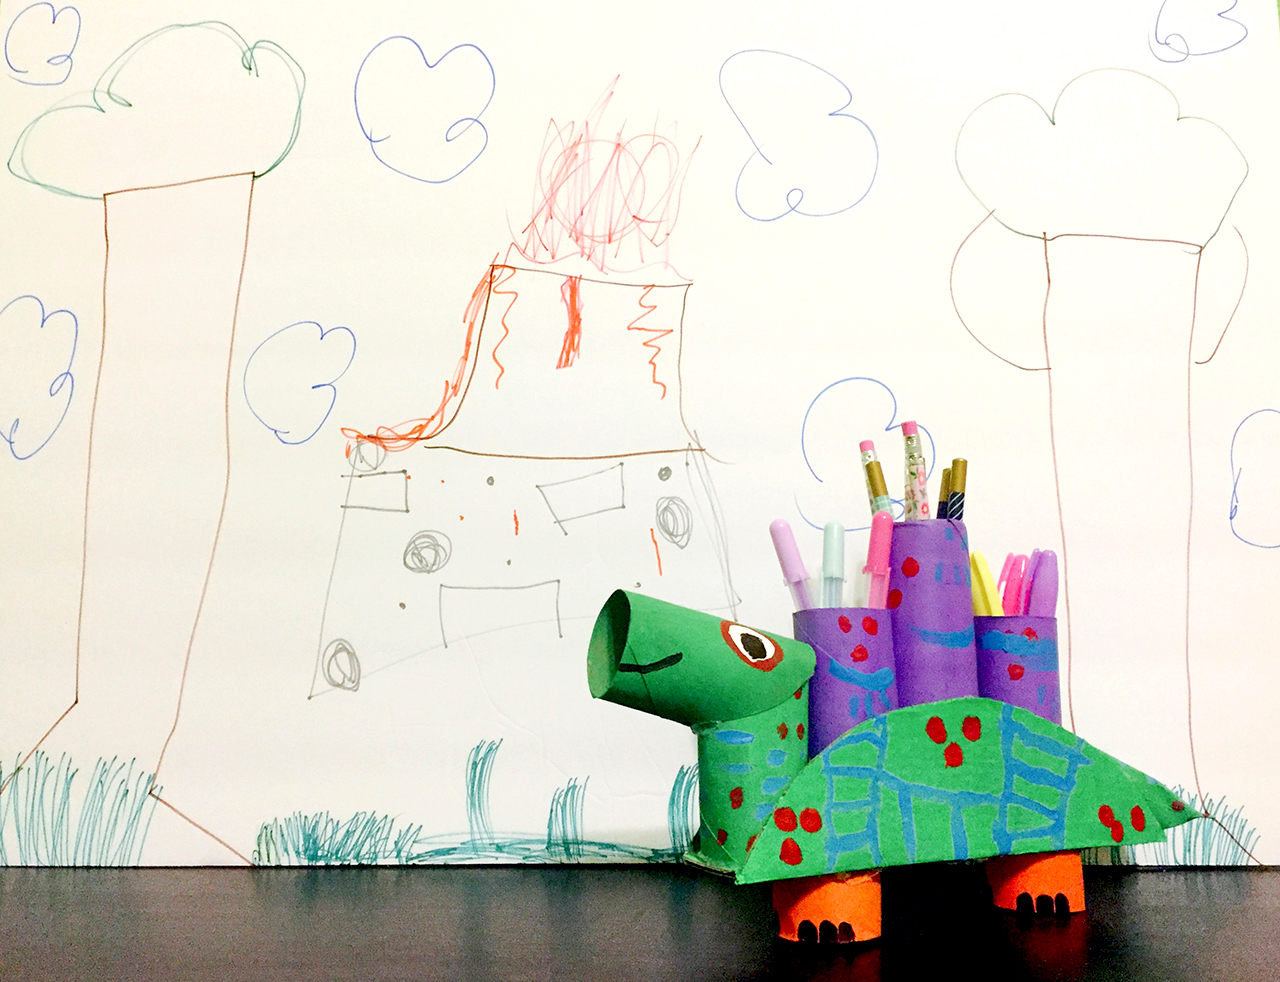
Yah, you are done. I know there’s a lot of parts and pieces to creating this DIY dinosaur pencil holder but it’s all worth it in the end. It always turn out super cute and makes a great decorative piece for eveyone’s desk. The dinosaur is fun for kids to play with but also useful when it’s just sitting there. Emma has already created several as gifts and everyone loves them. We hope you love your dinosaur too.
Love,
Jeannie
Leave a Reply