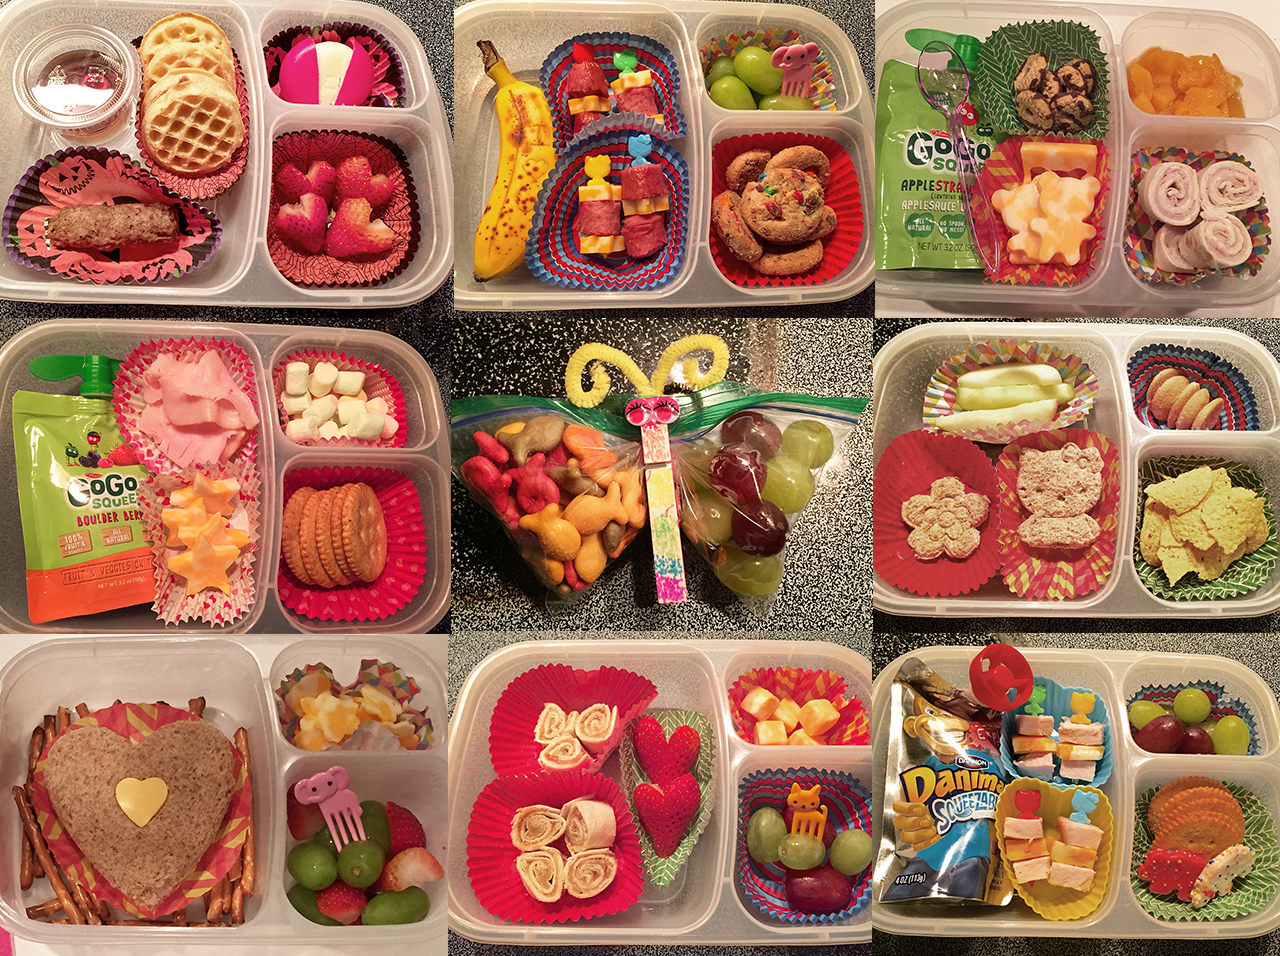
Summer has gone by so fast that I didn’t realize school was already starting. To me, that means time to make school lunches again. Do you have a picky eater or a kid who doesn’t like the food from the school cafeteria? Do you need a creative outlet or a way to get your kids to eat their lunch? I started making Emma’s school lunches in Kindergarten to make sure she would eat but also so she would have something to look forward to every day since she was a little scared to start a new school. I would think of fun ways to make her ordinary lunch a fun surprise. It eventually became a tradition to make her lunch every day and she never knows what’s in it. I’m in my 3rd year making her lunches and wanted to share some fun ideas. You’ll either hate me or love me for these easy-to-make school lunches. But first, let’s start with snacks!
SNACK IDEAS
If your kid is required to bring a morning or afternoon snack for school, you can easily organize bins with prepackaged snacks or buy in bulk to put them in snack bags.
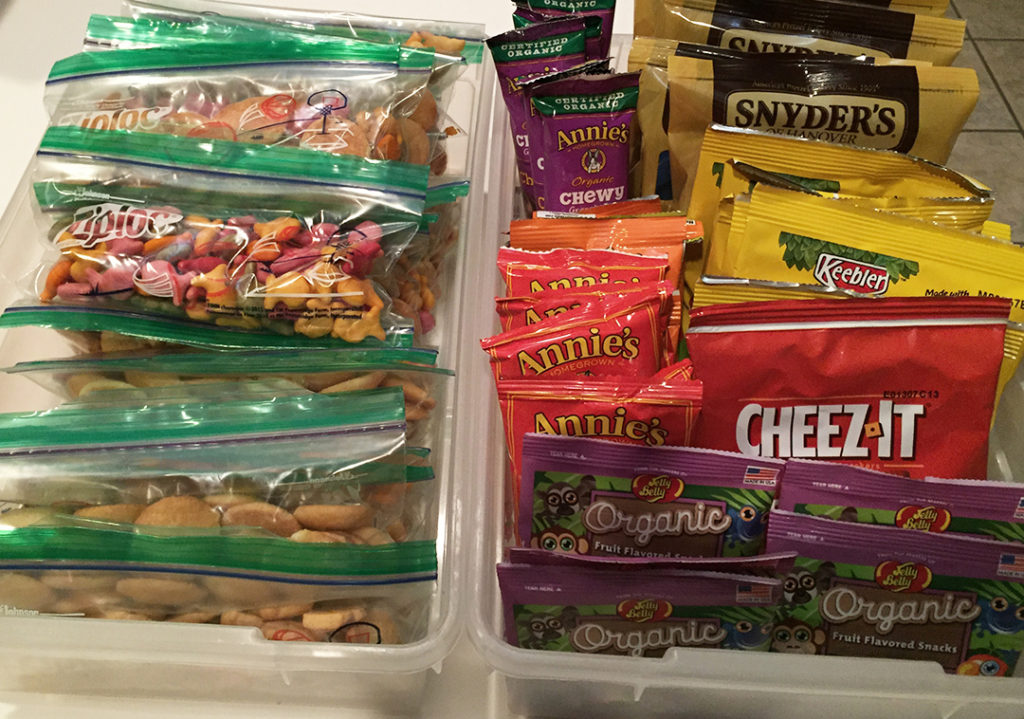
This is what Emma’s original bin looked like. She could easily pick a snack on her own to put into her backpack every morning. We also kept a basket of fruits/vegetables in snack bags in the fridge with squeezable applesauce and yogurt. This lasted about a year until Emma eventually wanted something different for her snacks, so we made these butterfly pins to make her snacks more fun. We created a variety of butterfly pins so I could use them year-round for her snacks. We even decorated holiday ones to use for different occasions. These butterfly pins are going on their second year of snack holding.
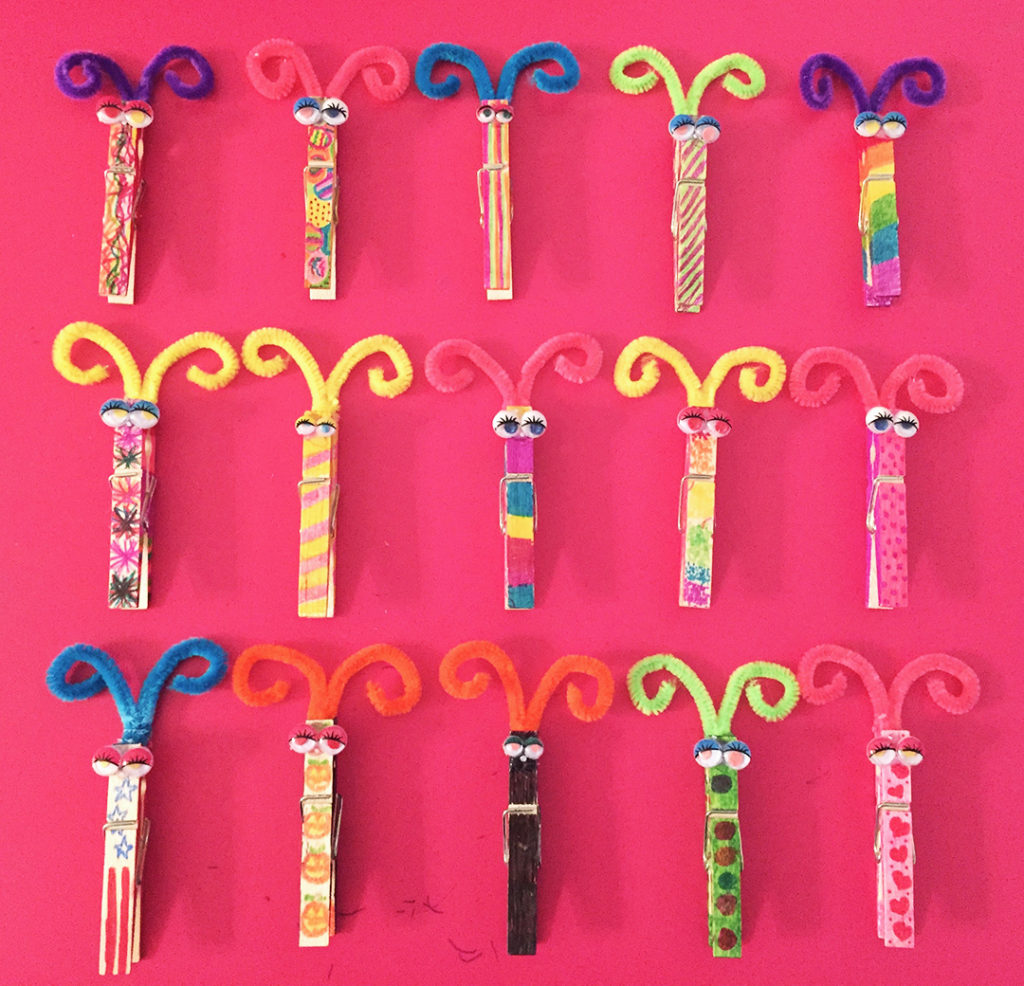
Here’s what you’ll need to create butterfly pins:
- Wooden clothespins
- Googly eyes
- Pipe cleaners (we cut in half because they were too long)
- Sharpies
- Hot glue gun and glue sticks
- Snack-size ziplock bags
Have your kid decorate each clothespin with sharpies in any design they want. Add two googly eyes and two pipe cleaners for each butterfly pin. Take each pipe cleaner and curl them to make them look like a butterfly antenna. Then hot glue the googly eyes on the clothespin and the pipe cleaners for the antennae. Once you add food to the snack bag, zip it up and clip the center with the butterfly pin and gather it up to form your butterfly wings as shown below.
Pro Mom Tips: I like to fill half of the bag with the first snack, zip up that side, then pin the bag in middle about halfway up. Then I fill the other side and zip the rest of the bag. Finally, gather the rest of the middle of the bag into the butterfly pin. It helps me keep the different snacks separated.
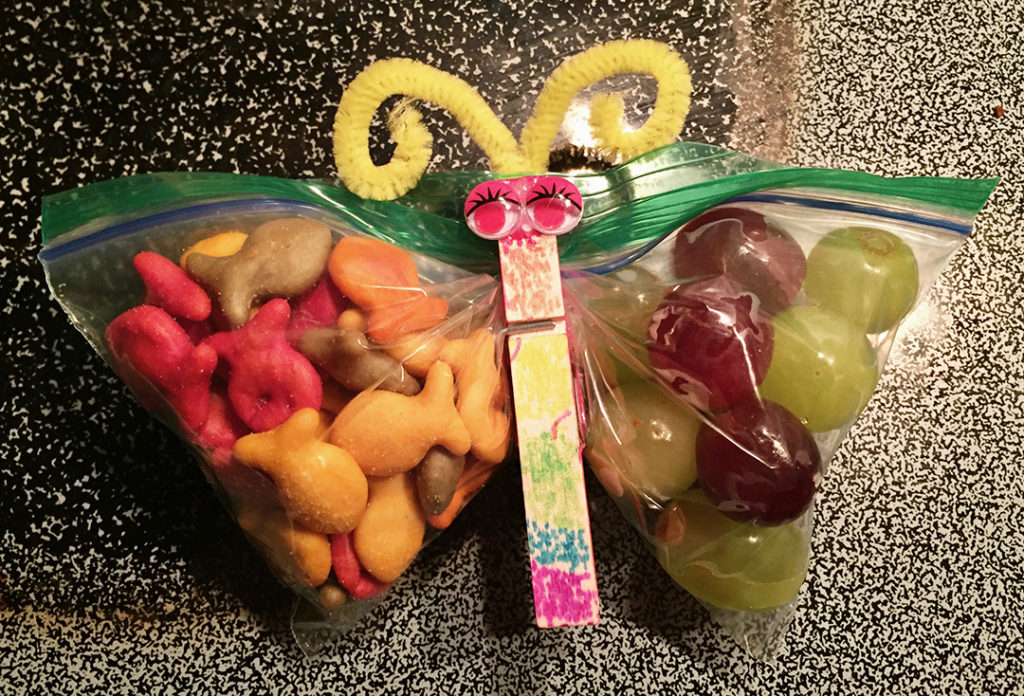
Here are some snacks that work well in the bags and satisfy the pickiest eaters:
- Gold fish / fruit or vegetable
- Pretzels / fruit or vegetable
- CheezIt / fruit or vegetable
- Veggie chips / fruit or vegetable
- Cereal / Marshmallows
- Mini muffins / fruit or vegetable
- Trail mix / fruit or vegetable
- Animal crackers / fruit or vegetable
Fruits: Grapes, apple slices, strawberries, blueberries, raspberries, cherries, cut up banana and peeled clementines
Vegetables: carrot sticks, celery sticks, cut peppers (red, yellow or green), cherry tomatoes and cucumber slices
LUNCH IDEAS
I have created many variations of lunches throughout the years, so I’ve narrowed it down to a few basic ones here along with ideas to easily change things up. It’s important to keep in mind that my kid doesn’t eat very fast, so add more food as necessary. The amount of food can be easily adjusted in any of these ideas.
Here are a few supplies you’ll need to create these lunches. Don’t forget to pick up different holiday ones too.
- Variety of paper cupcake liners
- Picks with characters or shapes in different colors
- Cookie cutters/ mold cutters / mini vegetable and fruit stamps
- Mini forks and spoons
- I bought these 3-compartment lunch containers for standard lunch bags kids carry for school.
- A fun kit with a variety of stuff you can use to make lunches fun
Pro Mom Tip: With the cupcake liners, I turn them inside out to help make the designs pop with the food and use them to help contain the food. You can also use silicone cupcake shapes which are a great reusable alternative.
BREAKFAST LUNCH
This may seem a little weird, but I love breakfast anytime for any meal. These are the two main breakfast meals I make for Emma’s lunches. I usually change up the sides so it’s not always the same.
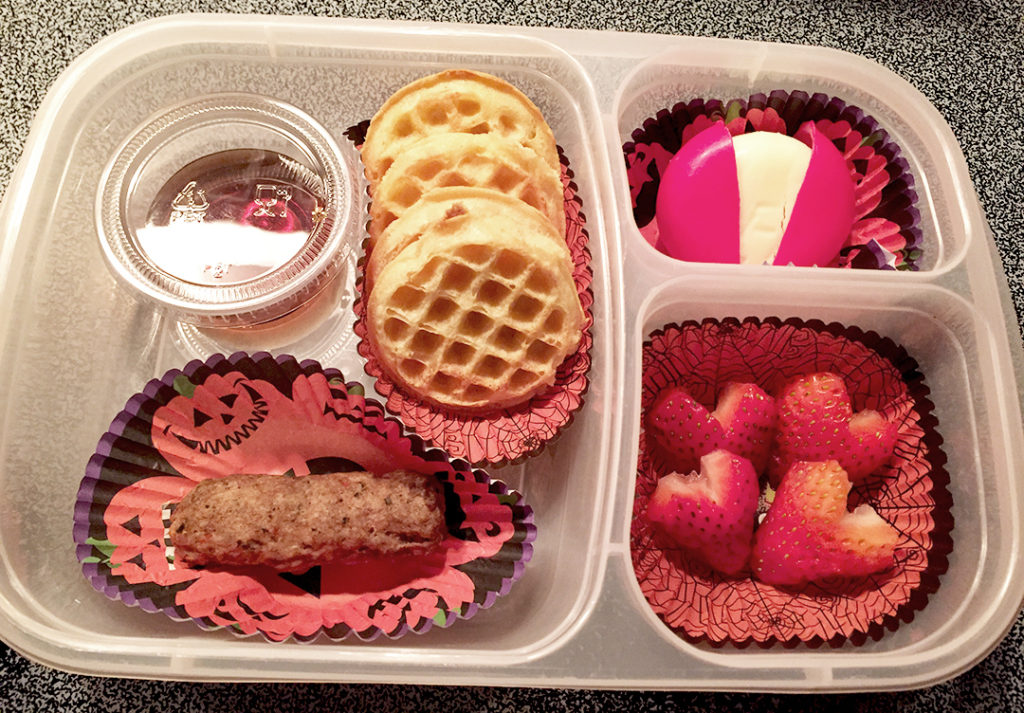
- Mini waffles (they come in 4s so perfect for the lunch box)
- Turkey sausage link
- Small container with maple syrup
- Babybel cheese
- Fruit/vegetable
Pro Mom Tip: If you cut a strawberry in half from top to bottom, cut out a little v at the top center, then the strawberry will form a heart.
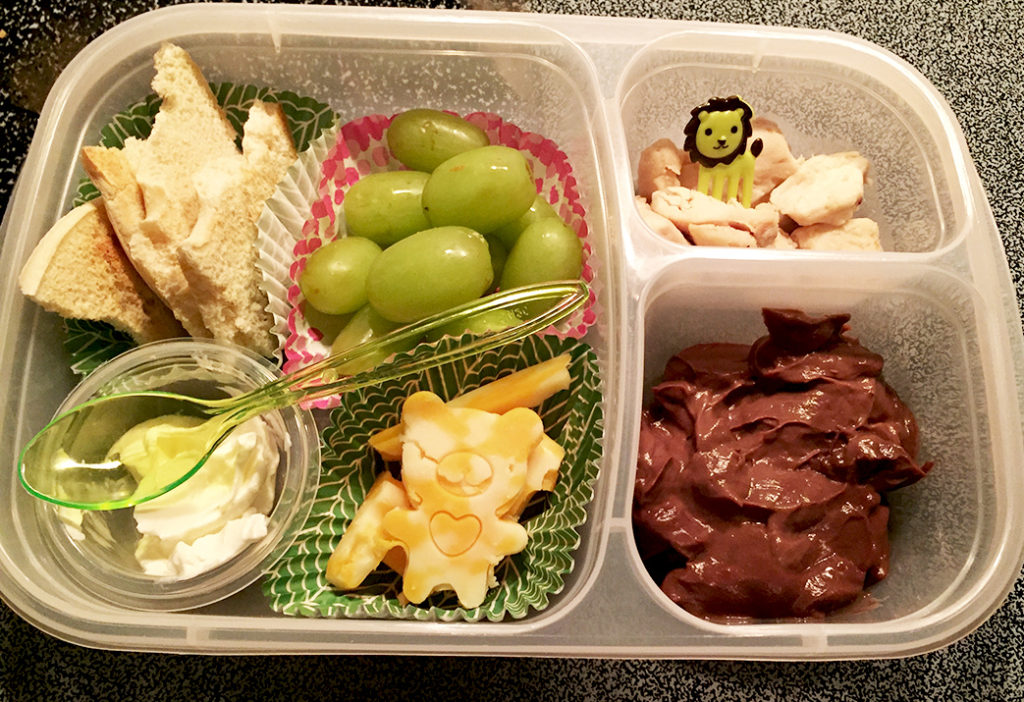
- Half a bagel toasted (I tear it up for easy dipping)
- Small container of cream cheese
- Teddy bear cheese stamped out
- Fruit/vegetable
- Chicken pieces
- Chocolate pudding
Pro Mom Tip: If your child has trouble closing the container after lunch, then avoid pudding or anything with juices because you will have leakage in the lunch bag. Trust me, I know from experience.
HOT DOG LUNCHES
What kid doesn’t like hot dogs? You can easily make a hot dog with bun and cut it in half to fit into the container but if your kids are like Emma, they like the hot dog more than the bun. Here’s some ways to change it up for their lunches.
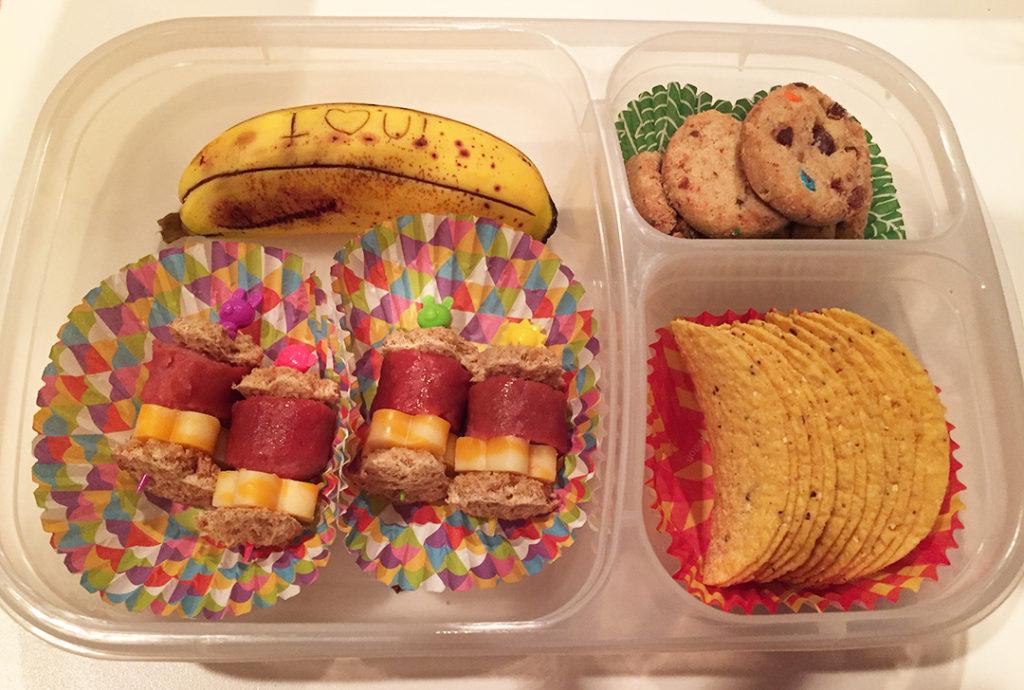
- Cooked hot dog, cut into 4 pieces
- Flower shaped bread, 8 stamped out of 1 loaf
- Flower shaped cheese stamped out
- Fun picks to keep them together
- Chips
- Cookies
- Small banana
Pro Mom Tip: You can carve a message on the banana peel with a toothpick and the message will show up when it’s lunchtime.
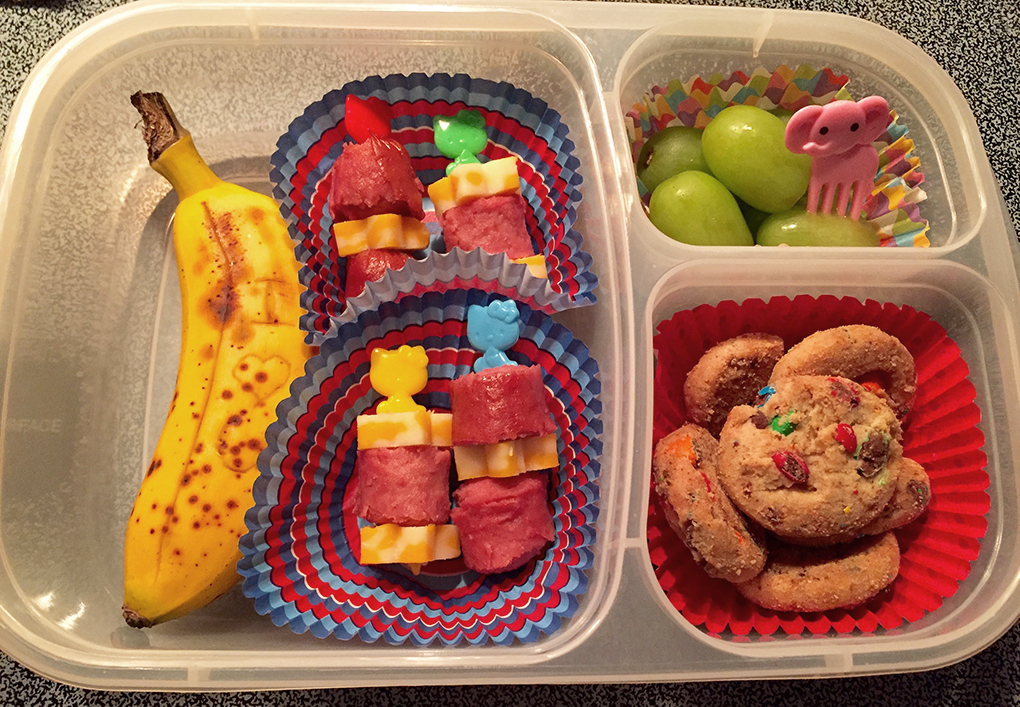
- Cooked hot dog cut into several pieces
- Flower shaped cheese stamped out
- Fun picks to keep them together
- Fruit/vegetable with a cute elephant pick
- Cookies
- Small banana
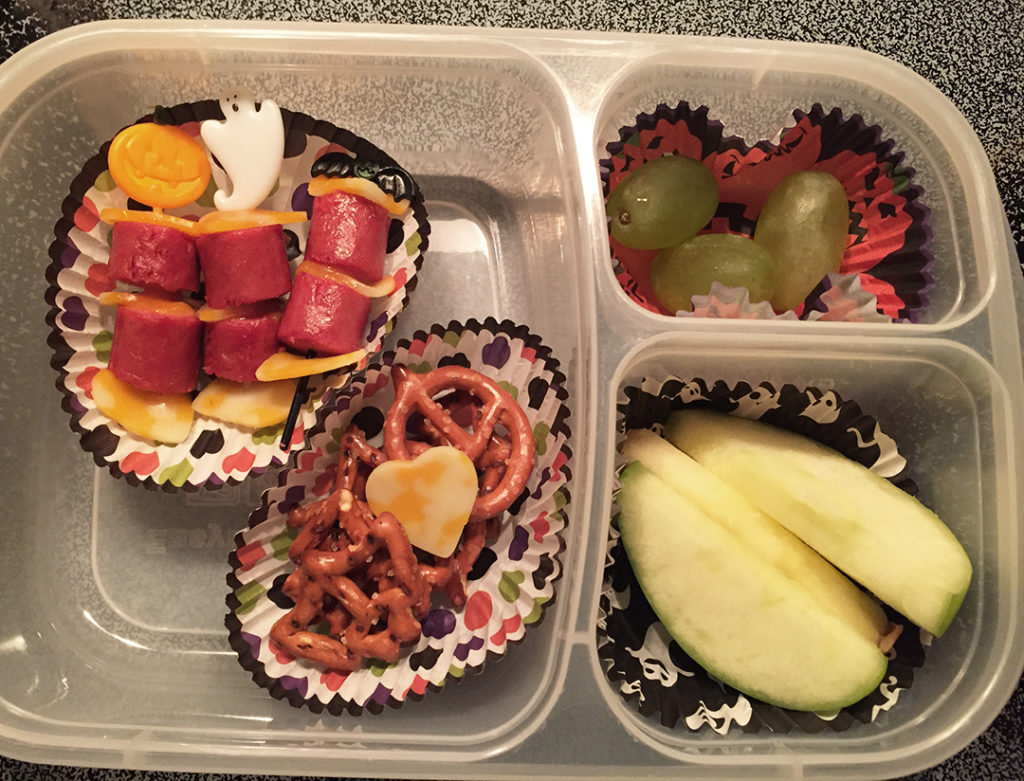
- Hot dog cut into several pieces
- Heart shaped slices of cheese stamped out
- Halloween picks to keep them together
- Spooky pretzels
- Fruit/vegetable
- Halloween cupcake liners turned inside out
DIY LUNCHABLES
We all know about the famous Lunchables – the easily accessible containers already made for kids to put together their meat, cheese and crackers. I think it’s the idea that they can build their food however they want that makes them popular. I know I’ve bought them many times for easy meals. In case you want to provide a healthier option or just save some money, here are some ideas to make at home.
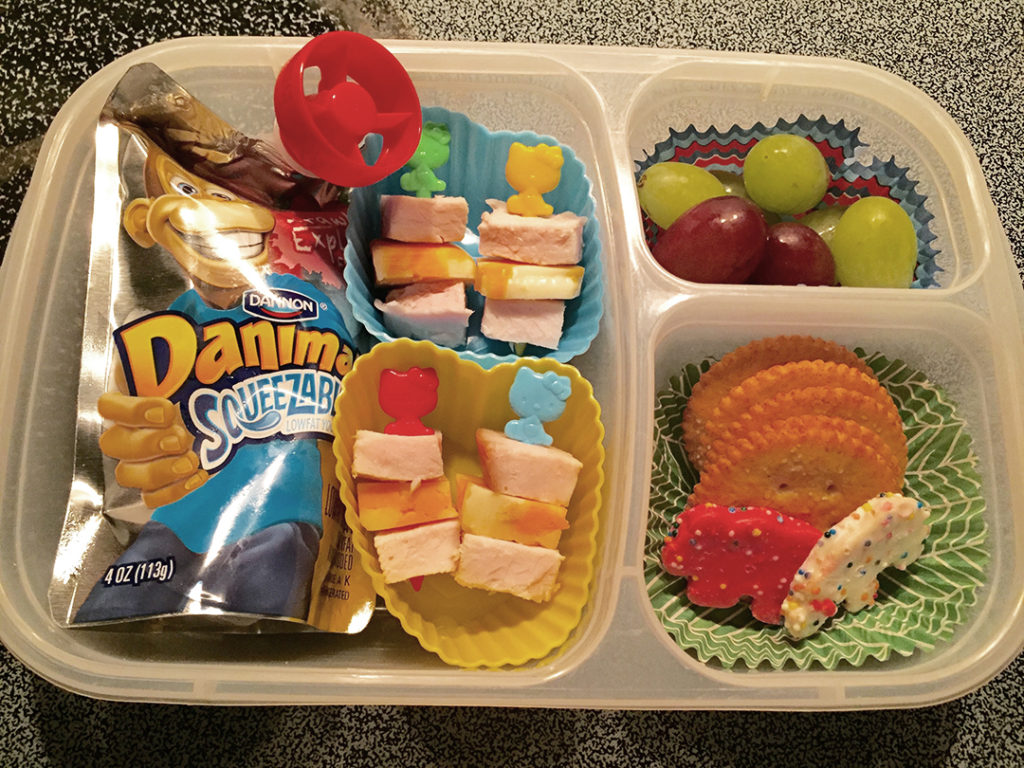
- Chicken cubed pieces
- Cheese cubed pieces
- Fun picks to keep them together
- Wheat Ritz Crackers
- Yogurt squeeze pouch
- Fruit/vegetable
- Frosted animal crackers
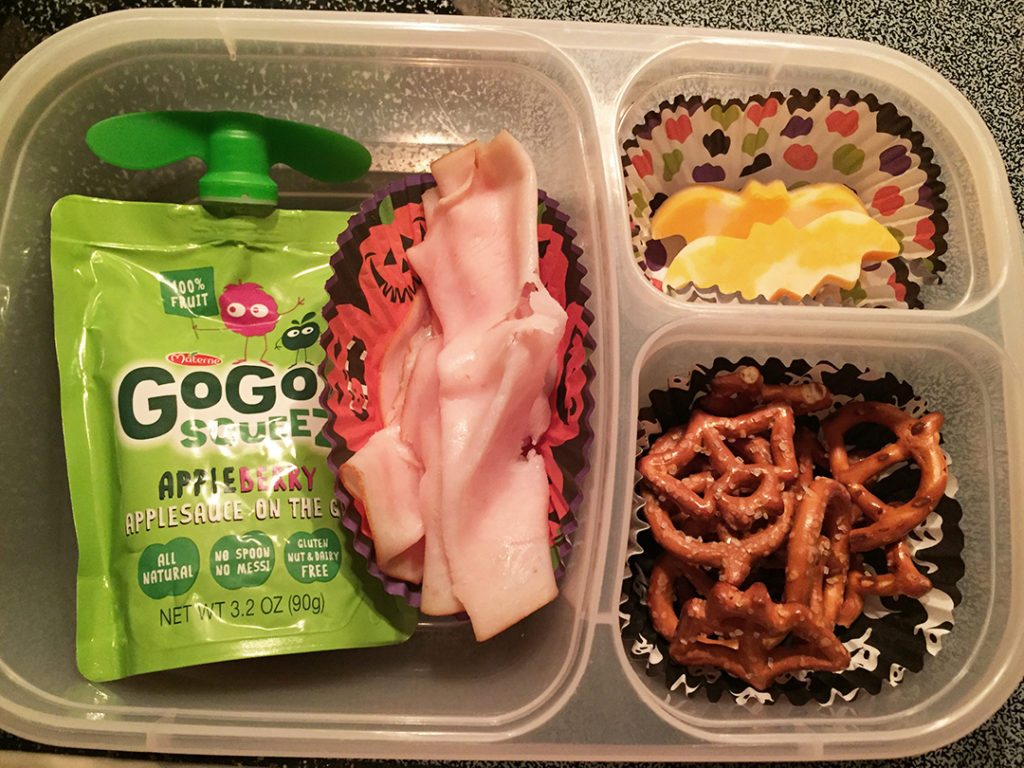
- Turkey slices
- Bat shaped cheese stamped out
- Spooky pretzels
- Applesauce squeeze pouch
- Halloween themed cupcake liners
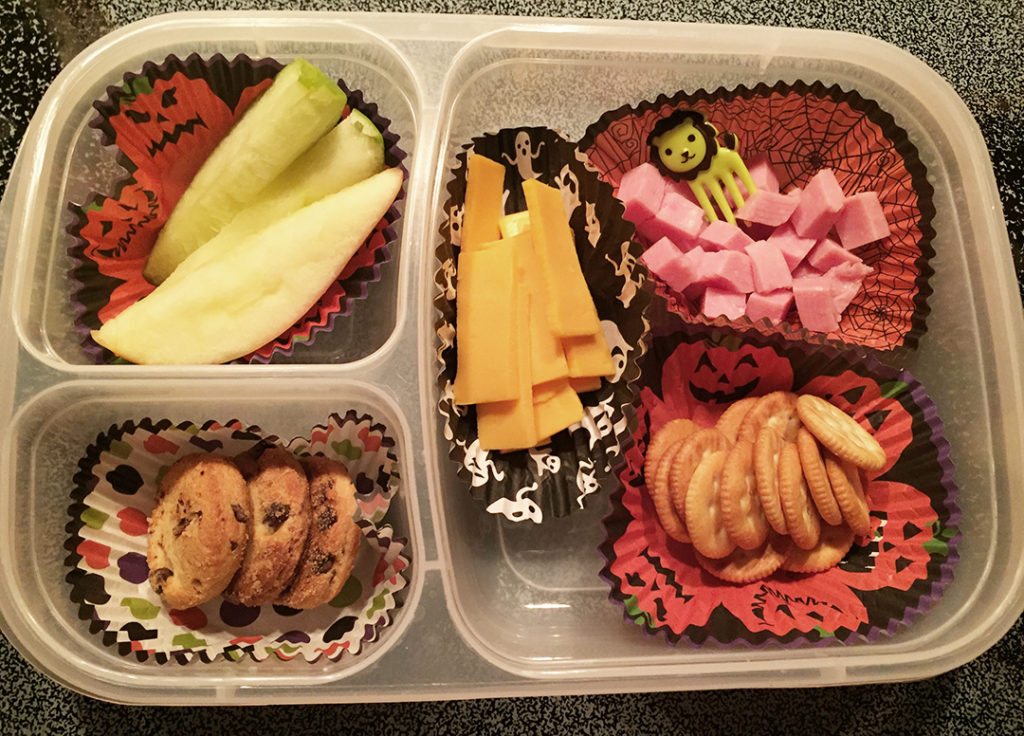
- Mini cubed ham
- Cute pick for the ham
- Mini ritz crackers
- Cheese strips
- Fruit/vegetable
- Cookies
- Halloween themed cupcake liners
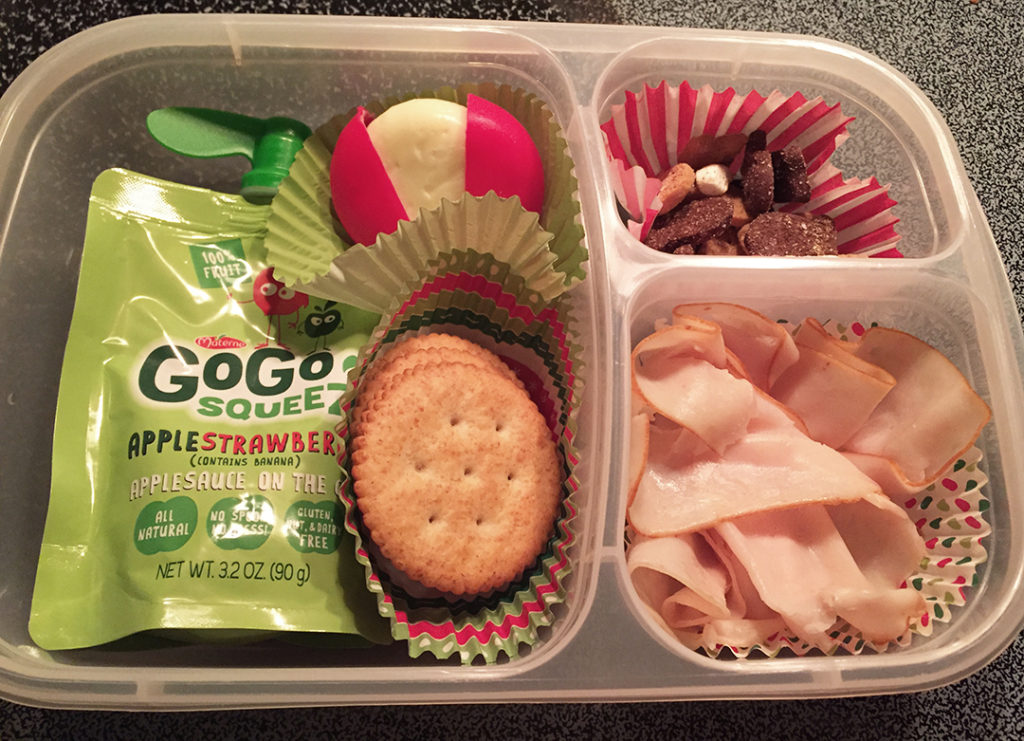
- Turkey slices
- Wheat ritz crackers
- Babybel cheese
- Applesauce squeeze pouch
- Trail mix
- Christmas themed cupcake liners
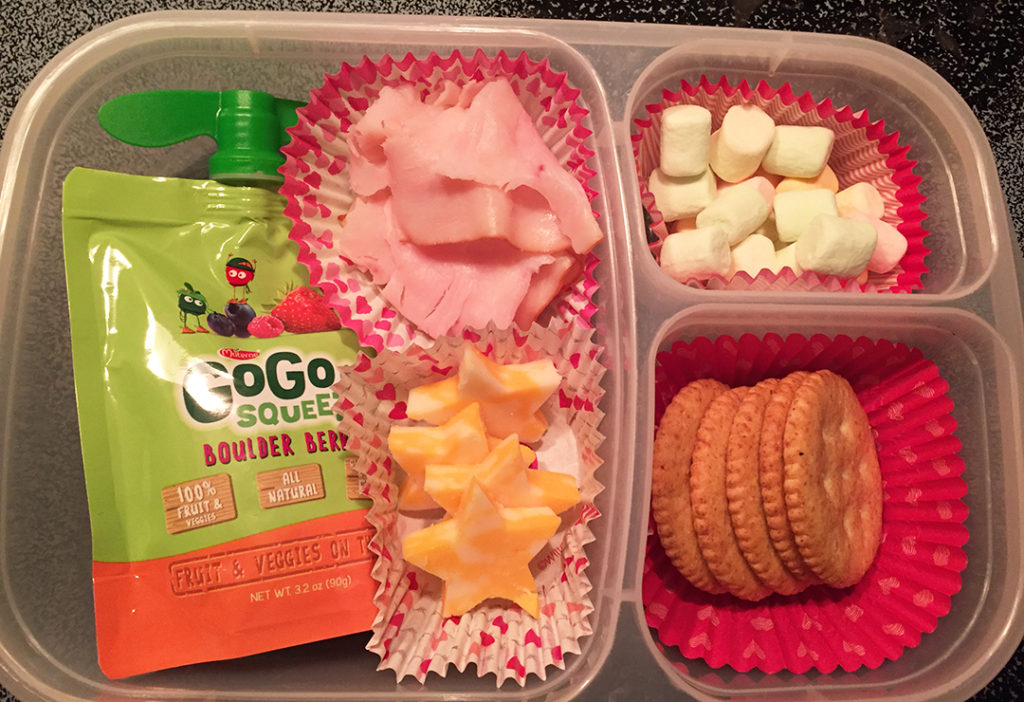
- Turkey slices
- Wheat ritz crackers
- Star shaped cheese stamped out
- Fruit and veggies squeeze pouch
- Marshmallows
- Valentine’s themed cupcake liners
PINWHEEL LUNCHES
Here’s a good alternative to a regular, boring old sandwich. Pinwheels are east to make and you can add any kind of spread as long as it’s still easy to roll. Emma is still a picky eater, so we stick with simple ingredients, but you can have a lot of fun with pinwheels.
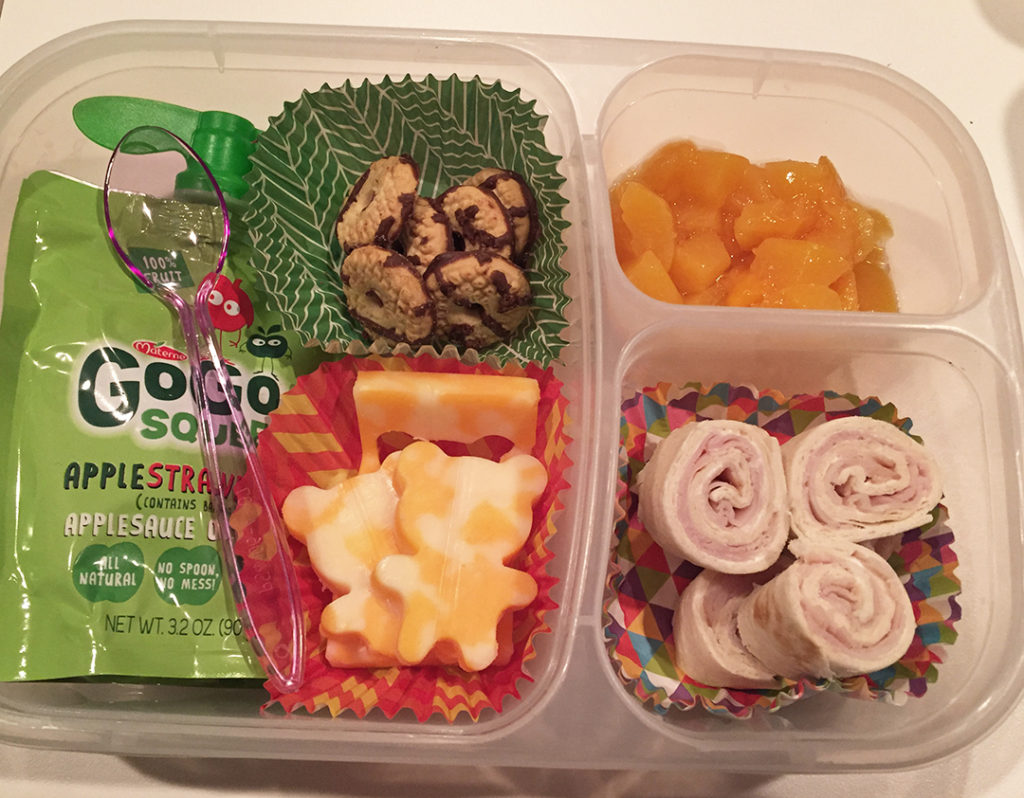
- Pinwheel – flour tortilla, turkey slices and cream cheese rolled up together and cut into bite size pieces
- Bear shaped cheese stamped out
- Cookies
- Fruit/vegetable
- Applesauce squeeze pouch
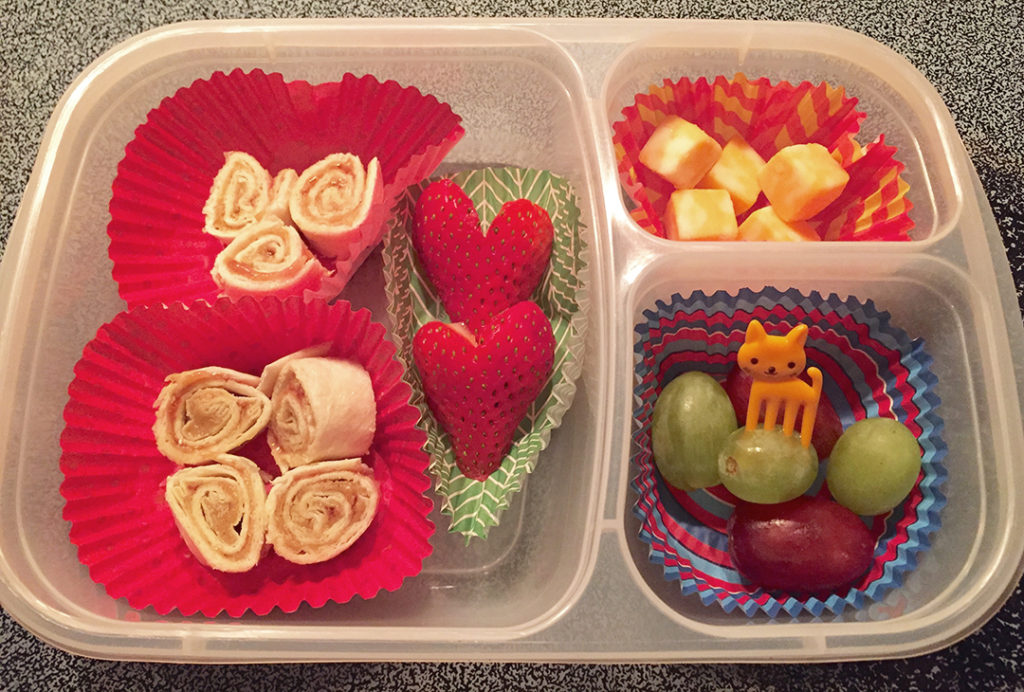
- Pinwheel – flour tortilla, peanut butter and jelly rolled up together and cut into bite size pieces
- Cheese cubes
- Fruit/vegetable with cute cat pick
- Heart-shaped strawberries
Pro Mom Tip: If you cut a strawberry in half from top to bottom, cut out a little v at the top center, then the strawberry will form a heart.
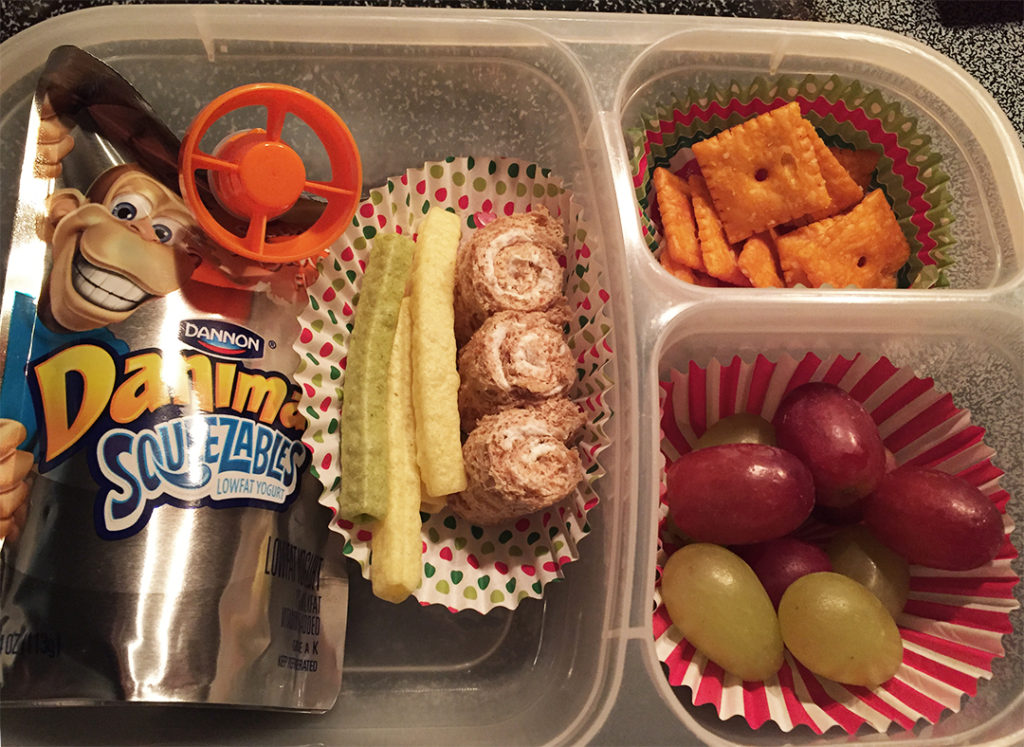
- Pinwheel – wheat bread with cream cheese
- Veggie sticks
- Yogurt squeeze pouch
- Cheez-its
- Fruit/vegetable
Pro Mom Tip: I pulled the crust off the bread and used a roller to flatten the bread out to make it easier to roll.
SANDWICH LUNCHES
You can’t go wrong with a sandwich, and here’s a way to make them more fun. Create all these with cookie cutters, mold cutters and mini fruit and vegetable stamps. I started with the full cookie cutters but then realized Emma doesn’t eat as much during the short time they have for lunch, so I started to do half sandwiches with smaller cutters.
Pro Mom Tip: Keep the bread in the fridge and it will be easier to cut through when the sandwich is made. Otherwise, the bread tears easily if it’s room temperature when cut.
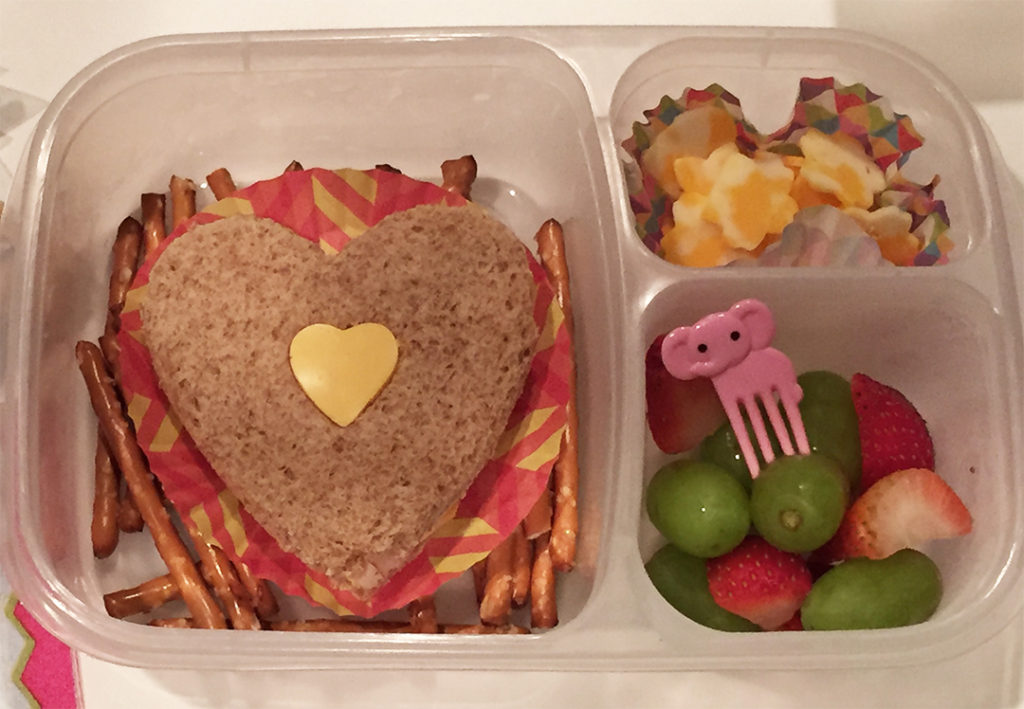
- Heart shape turkey and cheese sandwich with mini heart cutout
- Pretzel sticks
- Fruit/vegetable
- Cute elephant pick to add a touch of whimsy
- Flower and heart shape cheese stamped out
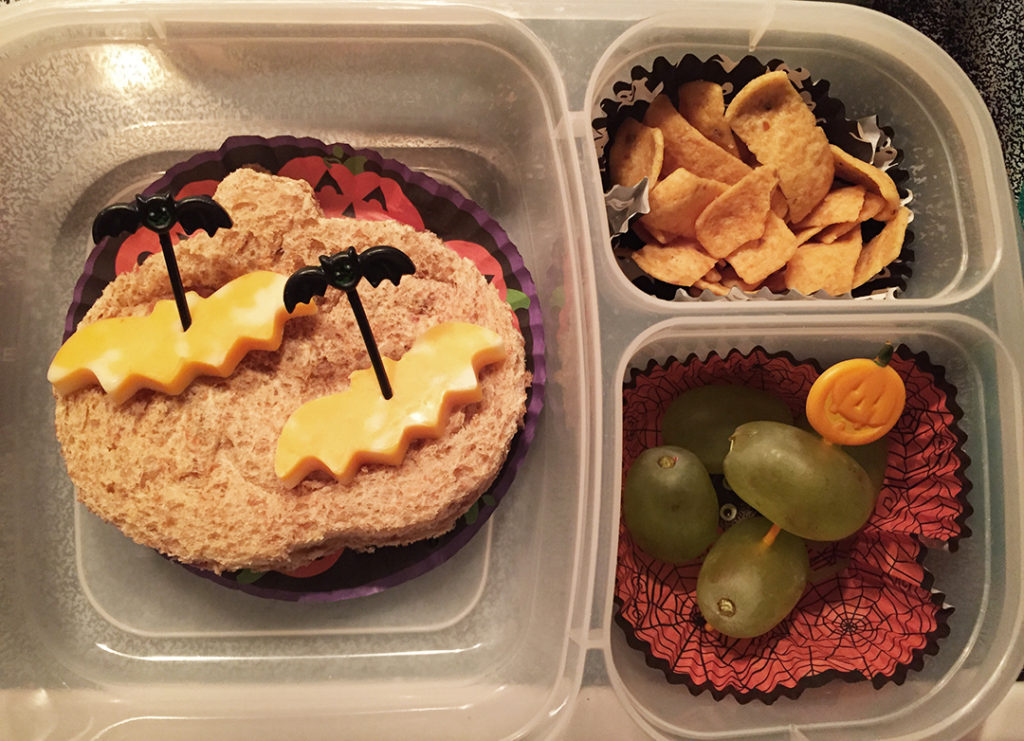
- Pumpkin shaped peanut butter and jelly sandwich
- Bat shaped cheese stamped out
- Fritos
- Fruit/vegetable
- Halloween picks and cupcake liner for added spook
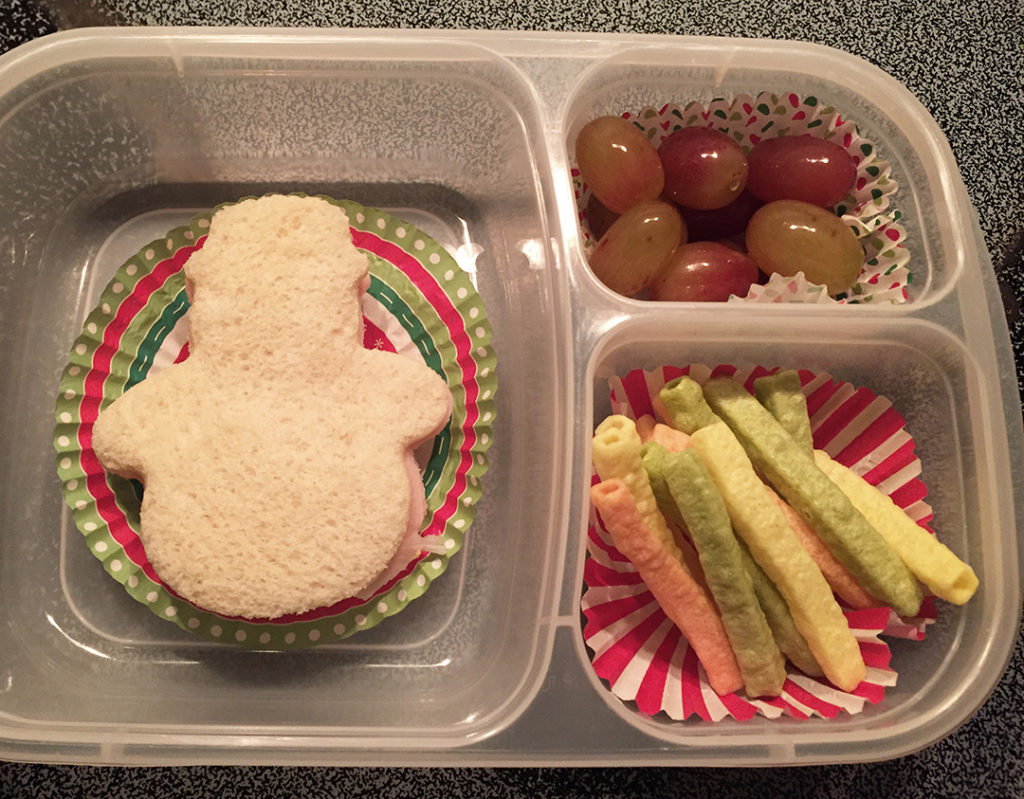
- Snowman shape ham and cheese sandwich
- Fruit/vegetable
- Veggie sticks
- Christmas cupcake liners
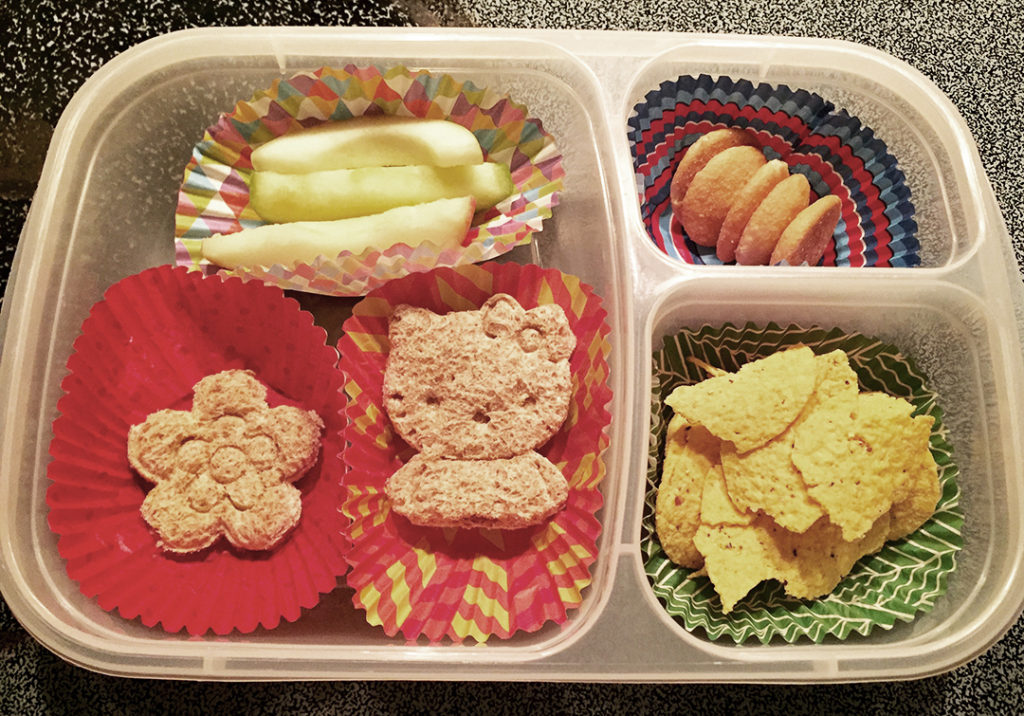
- Hello Kitty and flower shaped mini peanut butter and jelly sandwiches
- Fruit/vegetable
- Chips
- Cookies
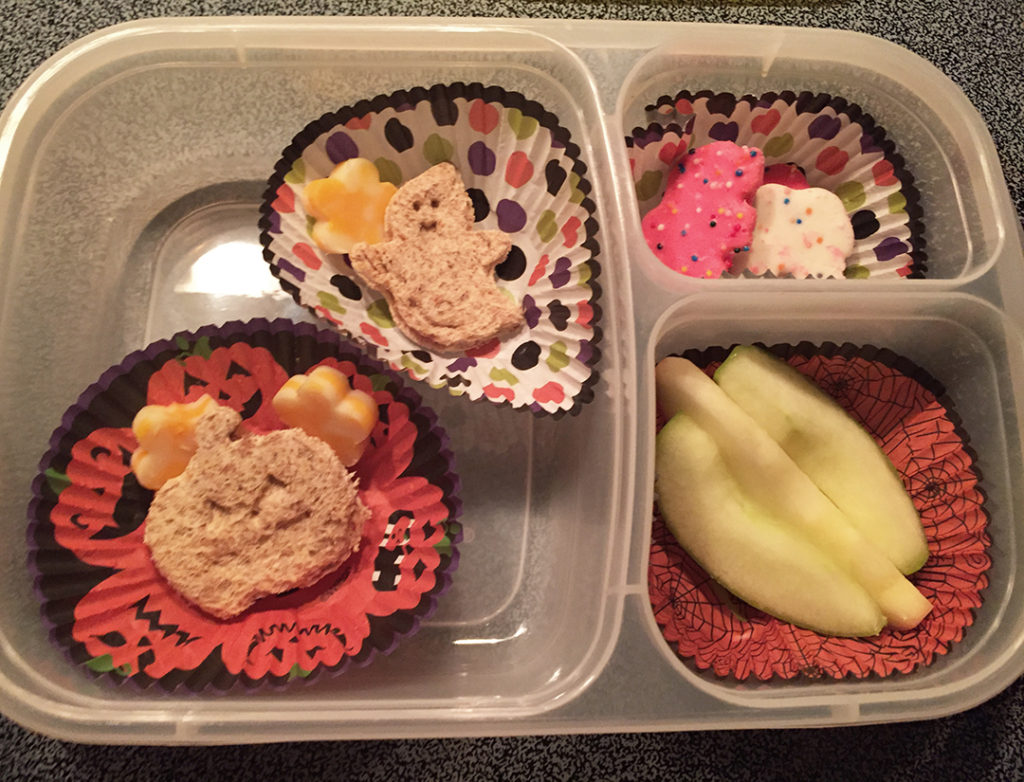
- Ghost and pumpkin shaped mini turkey sandwich
- Flower shaped cheese stamped out
- Fruit/vegetable
- Frosted animal crackers
- Halloween cupcake liners
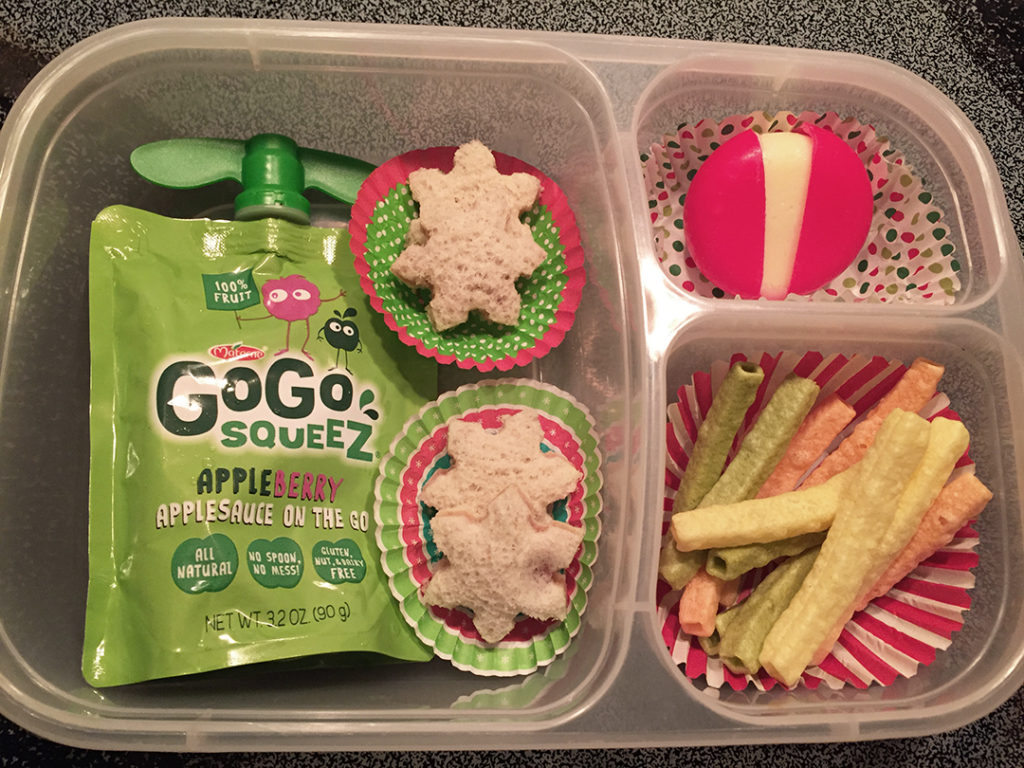
- Snowflakes shaped mini peanut butter sandwiches
- Applesauce squeeze pouch
- Babybel cheese
- Veggie sticks
These are just a few ideas to get you started. Once you have the supplies to make all these cheerful, fun lunches it’s pretty easy to put them together. Keep everything in one place so you can easily grab what you need. I have a kitchen storage cart just for snacks and lunch supplies for the whole family. Knowing what you’re looking for also makes it easier to keep an eye out for seasonal holiday supplies like cupcake liners and cookie cutters.
You can also add a few other little surprises to your kid’s lunch like a little note (I usually do a post-it message) and a cute napkin (themed, colorful or seasonal). It may seem overwhelming at first but if you’re already making their lunches, you might as well make it fun. Hey, I even make my lunches more fun and exciting too! 🙂
Love,
Jeannie
Leave a Reply