It’s that time of year again – Teacher Appreciation Week is the time to show your kid’s teachers how wonderful they are. Personally, we love crafting so it’s the perfect opportunity to give them something handmade with love. Teachers always appreciate gifts made or bought by the kids themselves because it makes it more personal. Here are a few ideas you can try at home.
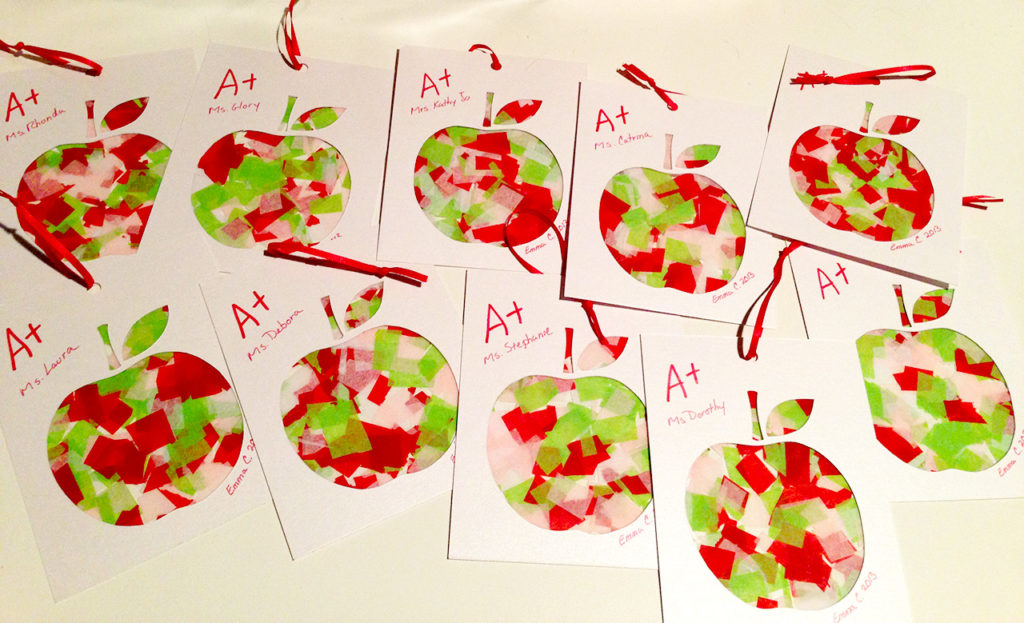
APPLE SUNCATCHERS
We first made apple suncatchers when Emma was three. She enjoyed designing the apple, picking the colors and applying the tissue paper to her apples. I recommend ages two and older for this craft.
Supplies:
• White cardstock, 110lb (8.5 x 11)
• Brightly colored tissue paper cut up into little squares, no bigger than 1/2 inch (we used red, pink and green)
• Self-adhesive laminating sheets (9 x 12)
• X-acto knife
• Red Sharpie
• Double stick tape
• Hole punch
• Thin ribbon
Step 1: Cut each cardstock sheet into four rectangular cards (4.25 x 5.5). Each suncatcher will require two cards, so you will get two suncatchers out of one 8.5 x 11 cardstock sheet.
Step 2: Cut each self-adhesive laminating sheet into four (4.25 x 5.5). Each suncatcher will only require one small cut sheet, so you will get four suncatchers out of an 9 x 12 sheet.
Step 3: Draw an apple on one of the cards. This can be drawn easily by the kids depending on age and skill level. Leave at least 1/2 inch around the apple to the edge of the card.
Step 4: Recommend for an adult. Cut the apple out with an X-acto knife. Once you have one cut out, you can use it as a template to trace inside on all the other cards. Every card will need to have an apple cut out. Each suncatcher requires two cards.
Step 5: While an adult is cutting the apples out, the kids can select the tissue paper colors. Take one of the cut self-adhesive laminating sheets and lay it on a flat surface with sticky side up. Peel the backing off and start placing the colored tissue paper on the sheet. Arrange the colors in an pattern or make it free form. Make sure to leave at least a 1/4 inch of stickiness exposed around the edges.
Pro Mom Tip: If the kids cover the edges with tissue paper, you can try peel parts of the tissues off, or you can add double stick tape around it later.
Step 6: Assemble the suncatcher: take one apple card and place it front-up on the table. Take the tissue paper covered adhesive sheet, flip it over and stick it to the top of the apple card. Make sure to line it up.
Step 7: Place double stick tape on each corner, Then take another apple card and place it on top of sticky tape (be sure to line it up with the bottom card). You should now have two apple cards with the colored tissue paper sheet in the middle. The front has the nice smooth apple and the back will have the tissue paper texture. You now have a colorful suncatcher that will reflect when you hold it up to the light.
Pro Mom Tip: If you want a cleaner look, you can add another sheet of self-adhesive to the back and then use double stick tape it on both sides of the cards.
Step 8: Punch a hole through the top of the apple and add a ribbon for hanging. Write a message on the front of the suncatcher to the teacher. Since Emma was young, we put an “A+” on all of the suncatchers.
Now you have the basics on how to create these suncatchers, you can do any shape you want. We have also made butterflies and hearts for Mother’s Day gifts.
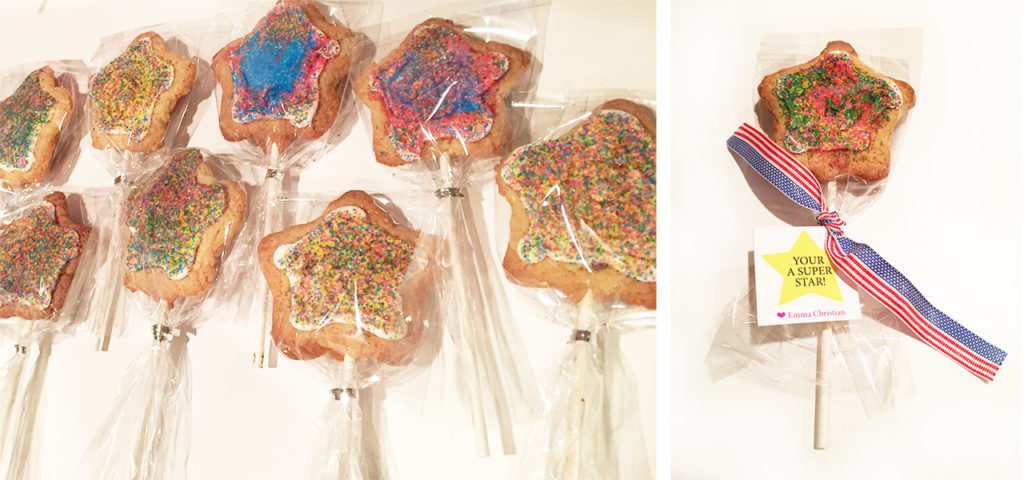
STAR COOKIES

If your kids like baking, this is a great gift idea that they can enjoy and give to their teachers. Depending on age, have them prepare the cookie dough, cut out shapes and decorate. An adult will probably want to handle the oven. This is another easy gift idea for kids age 2 and up.
Supplies:
• Cookie stick star pan
• Cookie sticks 8in
• Sugar cookie ingredients
• Icing
• Sprinkles
• Cellophane Treat Bags (4 x 9.5) with twisty ties
• Sandwich/zip lock bag
• Wax paper or cooling rack
• Ribbon
• Tag with hole punch
Step 1: Make the sugar cookie mix according to the directions.
Step 2: Spray or grease the pan to help the cookies pop out after it’s baked.
Step 3: Preheat your oven according to your cookie mix package or recipe.
Step 4: Scoop your cookie mix into the pan about halfway.
Step 5: Place the stick on top where at the indicated line.
Step 6: Fill the rest of the star shape with cookie mix and make sure the stick is completely covered.
Step 7: Bake according to the cookie recipe – until lightly brown on top.
Step 8: Once the cookies are done, take them out of the oven to cool. Repeat steps 4-8 until you’ve used all the dough.
Step 9: Prep your icing. Knead the icing package so it’s warm and easier to use. Place the icing into a ziplock bag or piping bag if you have some. Cut a small tip off one corner of the bag.
Step 10: Once the cookies have cooled, place them all facing up and start piping icing on top of the cookies.
Step 11: Time for the best part – sprinkles!
Pro Mom Tip: Emma mixed all of the sprinkles onto one plate. Then you can just dip the icing side down onto the plate.
Step 12: Place each cookie into a cellophane bag. Tie it with the twisty tie right under the cookie to hold in place.
Step 13: Add a ribbon and and gift tag to finish off the treat.
The cookies were a big hit with all of the teachers, and we even had some extras for ourselves.
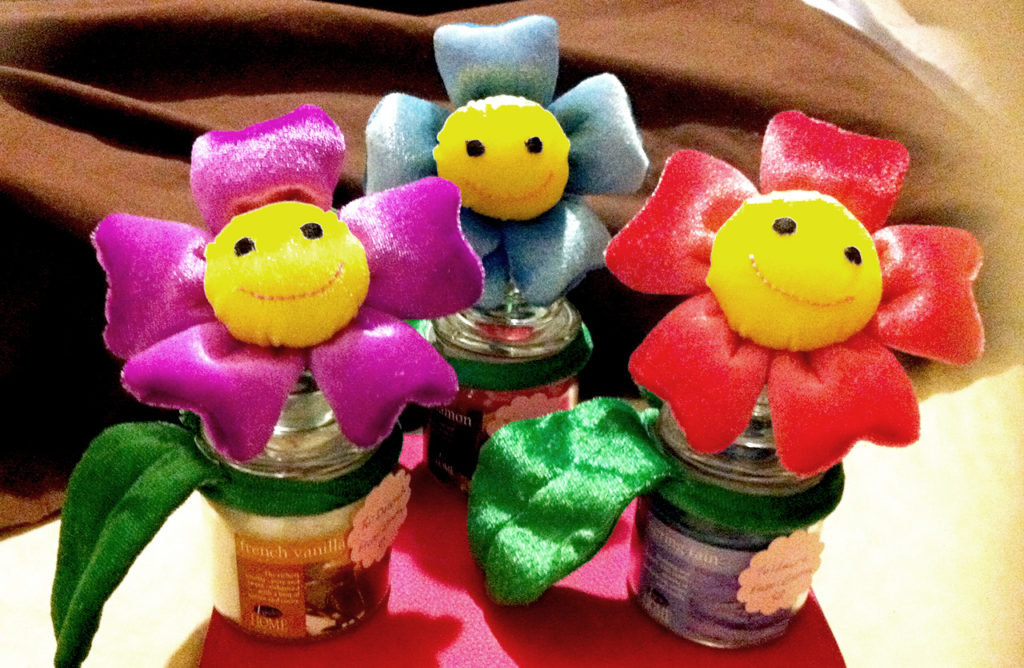
FLOWER DECORATED CANDLES

We made these teachers’ gifts when Emma was one. She picked out cute fabric flowers from the dollar bin at target. We also bought each teacher their favorite scented candles. Here are three easy steps to creating simple but cute gifts.
Supplies:
• Candle with lid
• Fake flower with wired stem
• Double stick tape
• Tag
Step 1: Make sure you have the front of the candle facing you.
Step 2: Take your flower and start with the bottom of the stem and wrap it around the space between the jar and the lid. Make sure it’s wrapped tight but leave enough wire on the top to be able to bend your flower so it sits on the top of the lid.
Pro Mom Tip: If you’re using silk flowers, you made need to use some hot glue or double stick tape to stick on the lid.
Step 3: Once you got your flower to look the way you like it on top, all that’s left is to adhere the tag to the jar with some double stick tape.
And you are all done and ready to give any teacher a gift they’ll enjoy, display and love to smell.
These are great gift ideas that you can do with the kids anytime. I wish I had more pictures of the steps of each one but they’re pretty simple. I hope you guys enjoy all of these creative ideas not just for teacher appreciation but for any gift-giving celebration.
Love,
Jeannie

Thank you so much for the great article, it was fluent and to the point. Cheers.